
DonCorson
[AHCI]
3358

It's Just a Tiny Screw
It's Just a Tiny Screw
Photos by Anna Yakutenok
Text and on the lathe Don Corson
What does it take to make a simple small part?
Let's follow the making of a horn screw for the UFO-Tourbillon case.
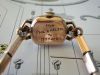
The lathe I will be using was made by G. Klett in East Germany in the late '50s. Here we see most of the tools I will be using, cross slide, tailstock, manual graver T-rest, a 2mm tap and tapping oil.
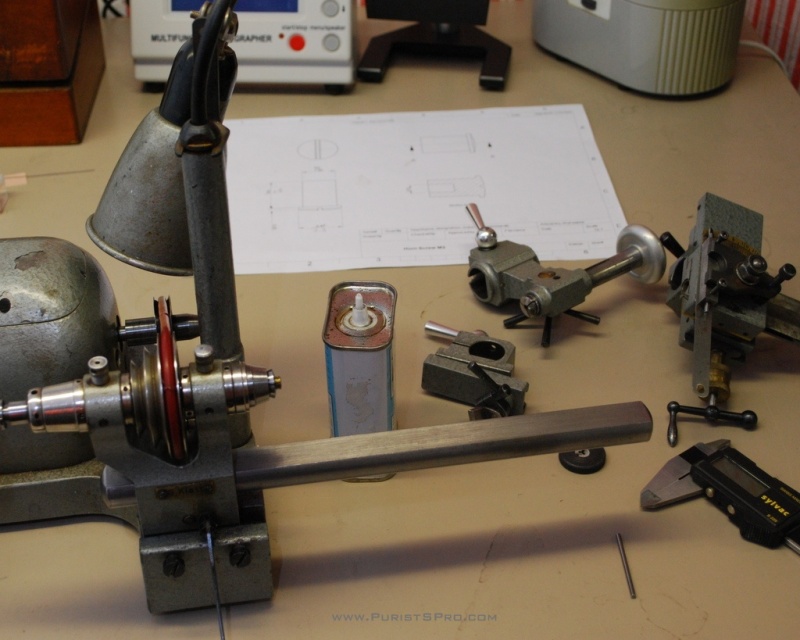
The screw I will be making is part of the case so it will not be made of standard carbon steel as most of the screws in a watch movement are, but of stainless steel 316L. Although the 316L is more difficult to machine than carbon steel in its "normalised" state, as it is delivered, we do not need to harden it to get a good polish so will save some manufacturing steps there.
Of course without a detailed drawing we don't know what we would like to make, so here it is. No more questions? Let's go!

The raw material I have is 2.4mm 316L rod, so let’s choose and insert the 2.4mm collet in the lathe.


I will start out installing the cross slide to turn the rod down to the 2.3mm that we need for the largest diameter of the screws head.


Now at 2.33, another 0.03 to go.


Now I face off the end of the rod to have a flat surface we can measure from.


Using the x-axis micrometer dial on the cross slide we measure off 3mm to turn down for the screws threads. The thread is a M2 thread, the theoretical major diameter is 2mm. The practical major diameter is 1.96mm for a M2 cutting tap.


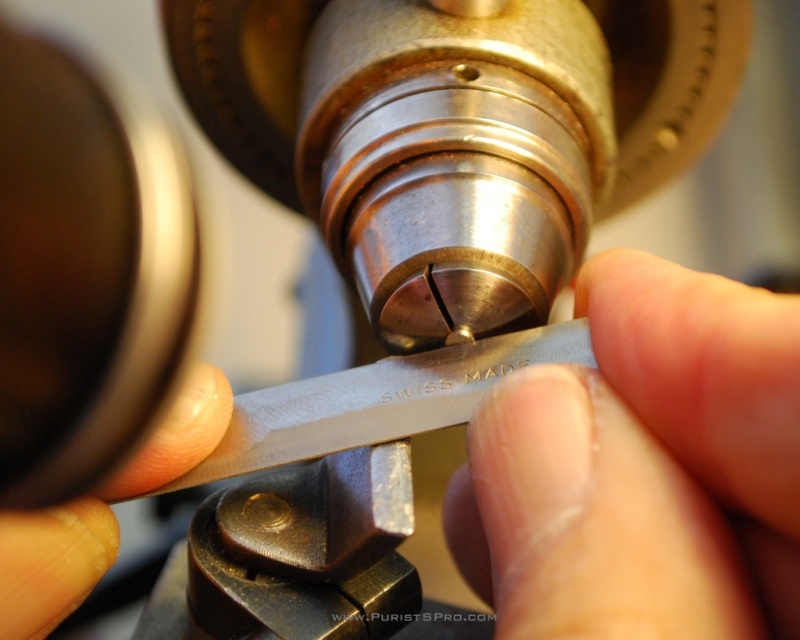
To help starting the thread cut I bevel the starting edge of the shank using a manual graver on the T-rest.

Now I prepare for threading the shank, mount the tailstock and insert the M2 tap in the holder.


A drop of tapping oil on the shank will make the thread cutting easier. The tailstock is used here just to hold the tap perpendicular to the shank so the threads start correctly.


Once the threads have started correctly the tailstock is just in the way so I remove it. A tap has a form on the entry side to gradually cut the thread. This makes thread cutting easier, but means that the thread does not really go completely up to the end. To thread completely up to the head of the screw once the tap has reached the head I turn the tap over in the holder and continue tapping.


Now that the thread is cut I put the cross slide back on the lathe to cut the thread to length. The drawing says the threaded portion of the screw must be 2.8mm long. Again using the x-axis micrometer on the cross slide I measure from the back of the screw head back 2.8mm and face off.


Using the T-rest again I use a graver to add a bevel to the end of the screw and catch the center so the drill will not wander when drilling the center.


Now I mount the tailstock to drill the center. Of course a "standard" screw is not drilled, but this screw is not standard. After mounting the tailstock I select a 0.9mm drill and get back to work. Note that in drilling on the lathe it is not the drill that turns but the piece being drilled, the drill is stationary just being advanced as needed.


All the manipulations from the shank side of the screw are now finished. Using a hand graver on the T-rest I now mark the position and cut off the head with a saw.


I now replace the collet in the lathe with a 2mm collet and insert the threaded shaft. In this case the threads are hard enough that they are not damaged by the steel collet. For non-hardened carbon steel screws I use brass collet inserts to avoid damaging the threads. I now face off the head of the screw to about twice the final thickness.


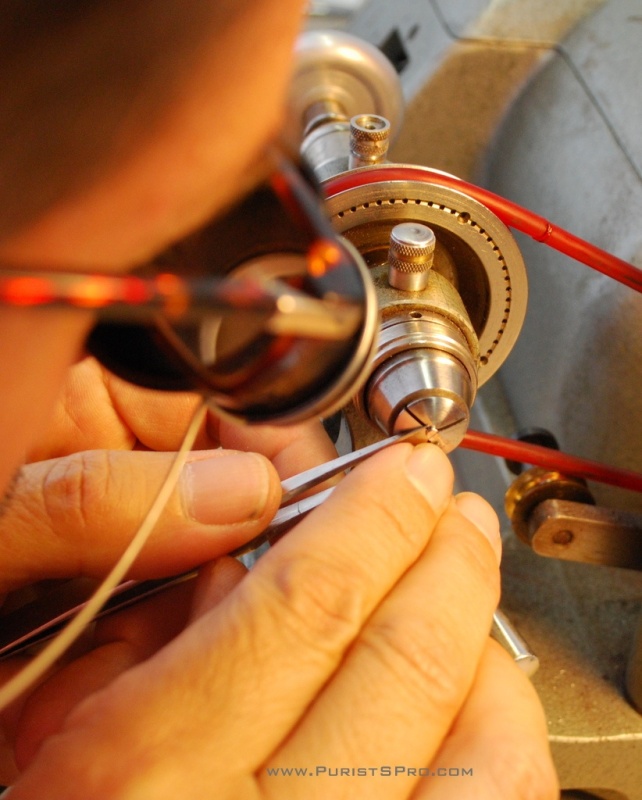
The most difficult operation in making a screw, for me at least, is cutting the slot really in the middle of the head. We are now at that point so the tension is mounting. I start off by mounting the T-rest again to aid in positioning the slot file. Position the file, concentration, start out cutting at one edge and cut across.


After the first couple of strokes are with the file are made I check to see if the slot is really in the middle of the head. A miracle, it is! If it isn't I take a cut across the head with the lathe to remove the marks and try again. But here I just need to file down to required depth and then thin the head to the needed thickness.


Now I am ready to polish the head. For polishing I use successive grades of lapping film. Lapping film is a kind of upper class sand paper. The grain and thickness of the abrasive on the plastic substrate is closely controlled allowing perfect results. I use 3 grain sizes 0.000009mm, 0.000003mm and 0.000001mm (9,3,and 1 micrometers). The 9µ m (blue) is to remove the surface irregularities from the lathe. It leaves a mat finish. The 3µ m (pink) leaves a poorly polished surface, 1µ m (light yellow) is polished. To make a perfectly flat surface such as a black polish it is necessary to place the abrasive itself on a perfectly flat and hard surface. A metal or glass support is used. The polishing is done with a linear motion working on the entire surface at once to keep it flat. For these screws I specified a rounded head so am using wood as the support and polishing on the lathe. As the head turns on the lathe the outer portion moves a longer distance than the center. As such more material is removed from the edge than the center. This together with the slightly soft wooden support automatically rounds the head. I start with the edges and then move to the surface of the head itself.


When all of the marks of the previous work have been removed and I have a homogeneous surface only with the marks from the present abrasive I can clean the surface with air and Rodico and then move on to the next finer grain. The cleaning is of utmost importance. If any residues of the previous abrasive stay on the piece it will leave scratches during the next step.


That looks pretty good to me.


Now we have the problem of the slot bevel. The edges need to be beveled so that the force of the screw driver turning the screw when tightening down does not leave a mark. I used to do this on the lathe too, but have found it is easier to remove the screw and put it in a mandrel. Using a square Arkansas stone the necessary bevel is quickly drawn.


With the screw out of the lathe it is easier to see the state of the polish. I now see that there are still some tiny scratches. It looks like the kind that come when the pores of the lapping film are filled up. There is then a surface of metal on the lapping film and it scratches. This happens quite fast when using the finer grades of lapping film. So I change the film and polish with 1µ m once more.


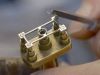
So finally we have it, one 2mm screw finished. How many steps? I have lost count. Time necessary? about 45 minutes.


The UFO-Tourbillon uses 6 such screws, 4 on the case and 2 on the buckle. Is it worth the time? I think so.


My thanks to Anna for bearing with me while making the pictures.
Don
This message has been edited by AnthonyTsai on 2012-07-26 15:50:52 This message has been edited by AndrewD on 2012-07-29 13:53:08
It's Just a Tiny Screw

The Devil is in the details...
Details...

Don, this explains much of what a watchmaker really is!

I second that!

You won't get that Wal-Mart contract at this rate!
Not true, but you'd earn about 2 cents an hour


Incredible! It gives a great perspective into why

That is why Luxury hand crafted stuff commands a huge premium.
Thanks for the detailed explanation ...
Thank you Don!
Wow!

Tiny screw for the watch maker

What a wonderful posting....
Fascinating .... Thanks so much for sharing

HQ post.

Very important nonetheless...

Just a tiny...

any possibility for some equipment and tool definition?

Simply Amazing

I was about to ask which manufacturers get their screws...
Ola, Marcelo, what Don is demonstrating to us...
Absolutely!

Thank you Don for taking the time to document how you make one of your screws

Now that is funny...

Great post DC!
Speechless...

Did it take so long??
In younger years...
Just another amazing post...

I'm reminded of the saying . . .

great stuff Don!
I guess I have trembling fingers !


It's just a tiny screw but the details are very impressive

Wow

Sure it is tiny, but the tolerances and finish are superior...

Please add my voice to the other awed readers....

Thanks Don - fascinating. What about the steel alloy?

Don said
My question was more specific
Properties of steel
This is the same material as a standard watch case.