
Lépine
1298

How master cuemakers made blanks for George Balabushka
So I got a very good question about how colors were added to the genuine 1959-1975 George Balabushka cue forearms in what is commonly called the points of a cue. It is a great question because this is what separates the great hall of fame cuemakers like Gus Szamboti, Tad Kohara, Richard Black and George Balabushka from the rest of the phonebook of "I can also make a cue" hobbyists.
There are many techniques for making points on a cue. I am going to only cover the main techniques used in the 1900-1970s, before computer controlled milling drills (CNC machines) technology were used.
From 1900s to 1970s, you had to be a master of the table saw in order to make points. The process was extremely difficult. If the woods chosen for the points was not dyed and dried properly and the glued correctly, the cue played like rubbish. Also the slices had to be perfectly aligned or there would be gaps and it played like month old rubbish. It was microns level of precision.
So most cues in the 1950s and 1960s used house cues from Brunswick, the famed Titlist, as a full spliced points blank. They were of the highest quality and easily available. The cuemaker simply cut them in half and provided a joint to screw the two pieces back together. Of course to earn their money, a wrap over the handle and inlay work was added so the customer had something more personal. Titlist blank cues are still highly sought after because of the great hit and performance of these cues. They were mass produced house cues originally, but the workmanship was at that time world class.
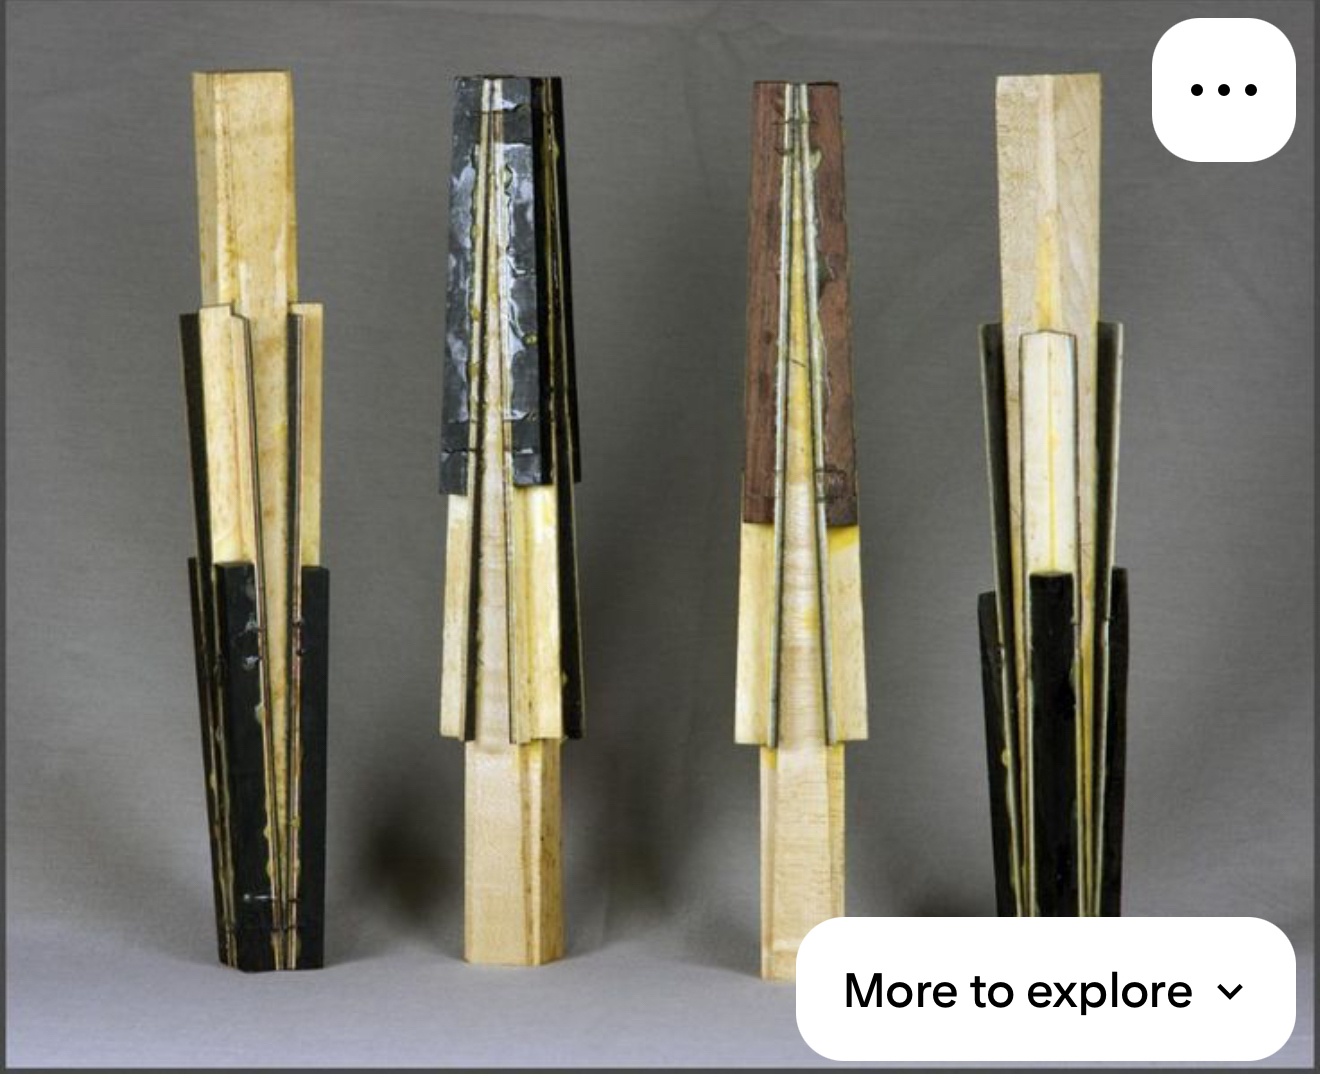
This is how full spliced cues were made.
Colors were added by stacking slices and veneers between the slices. This is often the most desired technique players want for their cues because it feels more solid. Hardwood meets hardwood. Little energy is lost or absorbed by the layers.
Titlist were basically made like below.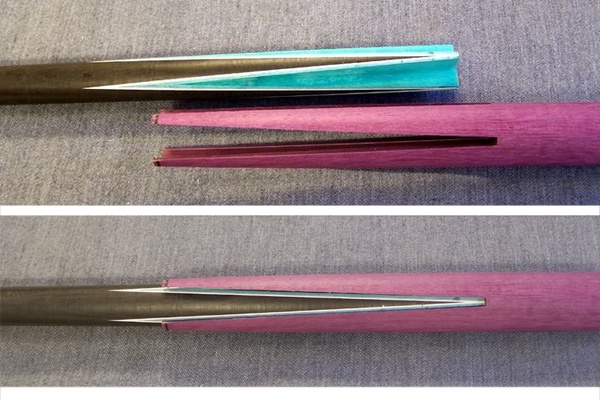
This is kind of a variation on the concept, normally not this many full spliced parts are used as this would normally weaken the cue.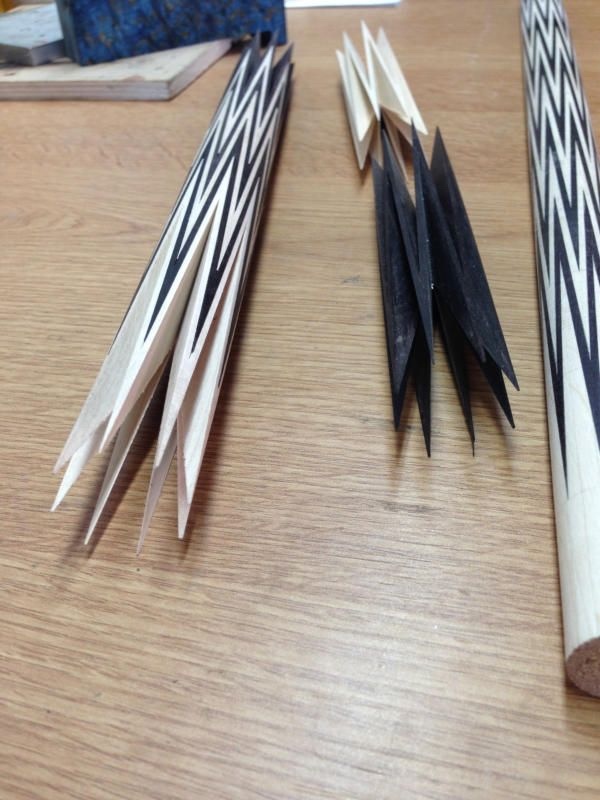
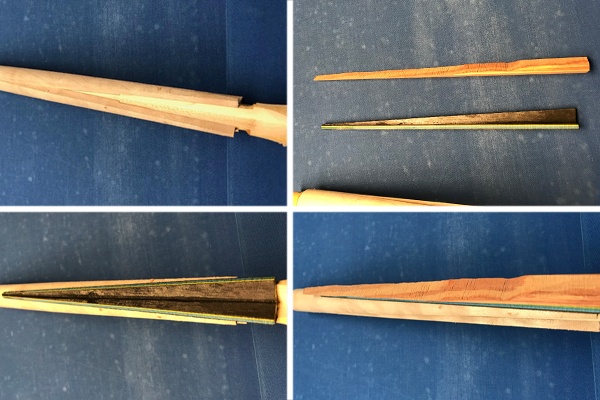
This is what a spliced joint looks like. It is very strong when held together with the proper glue. 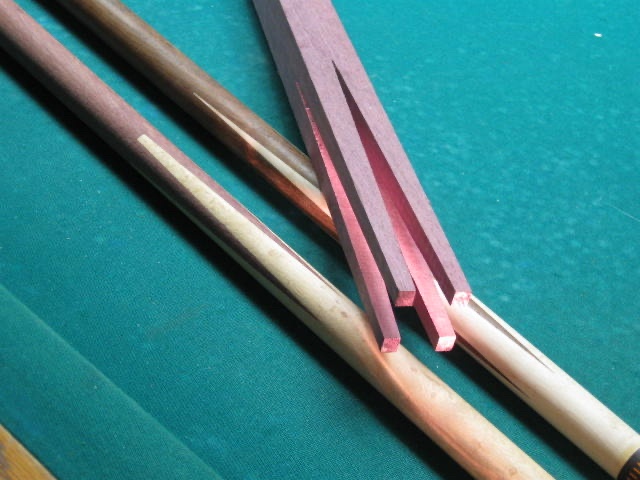
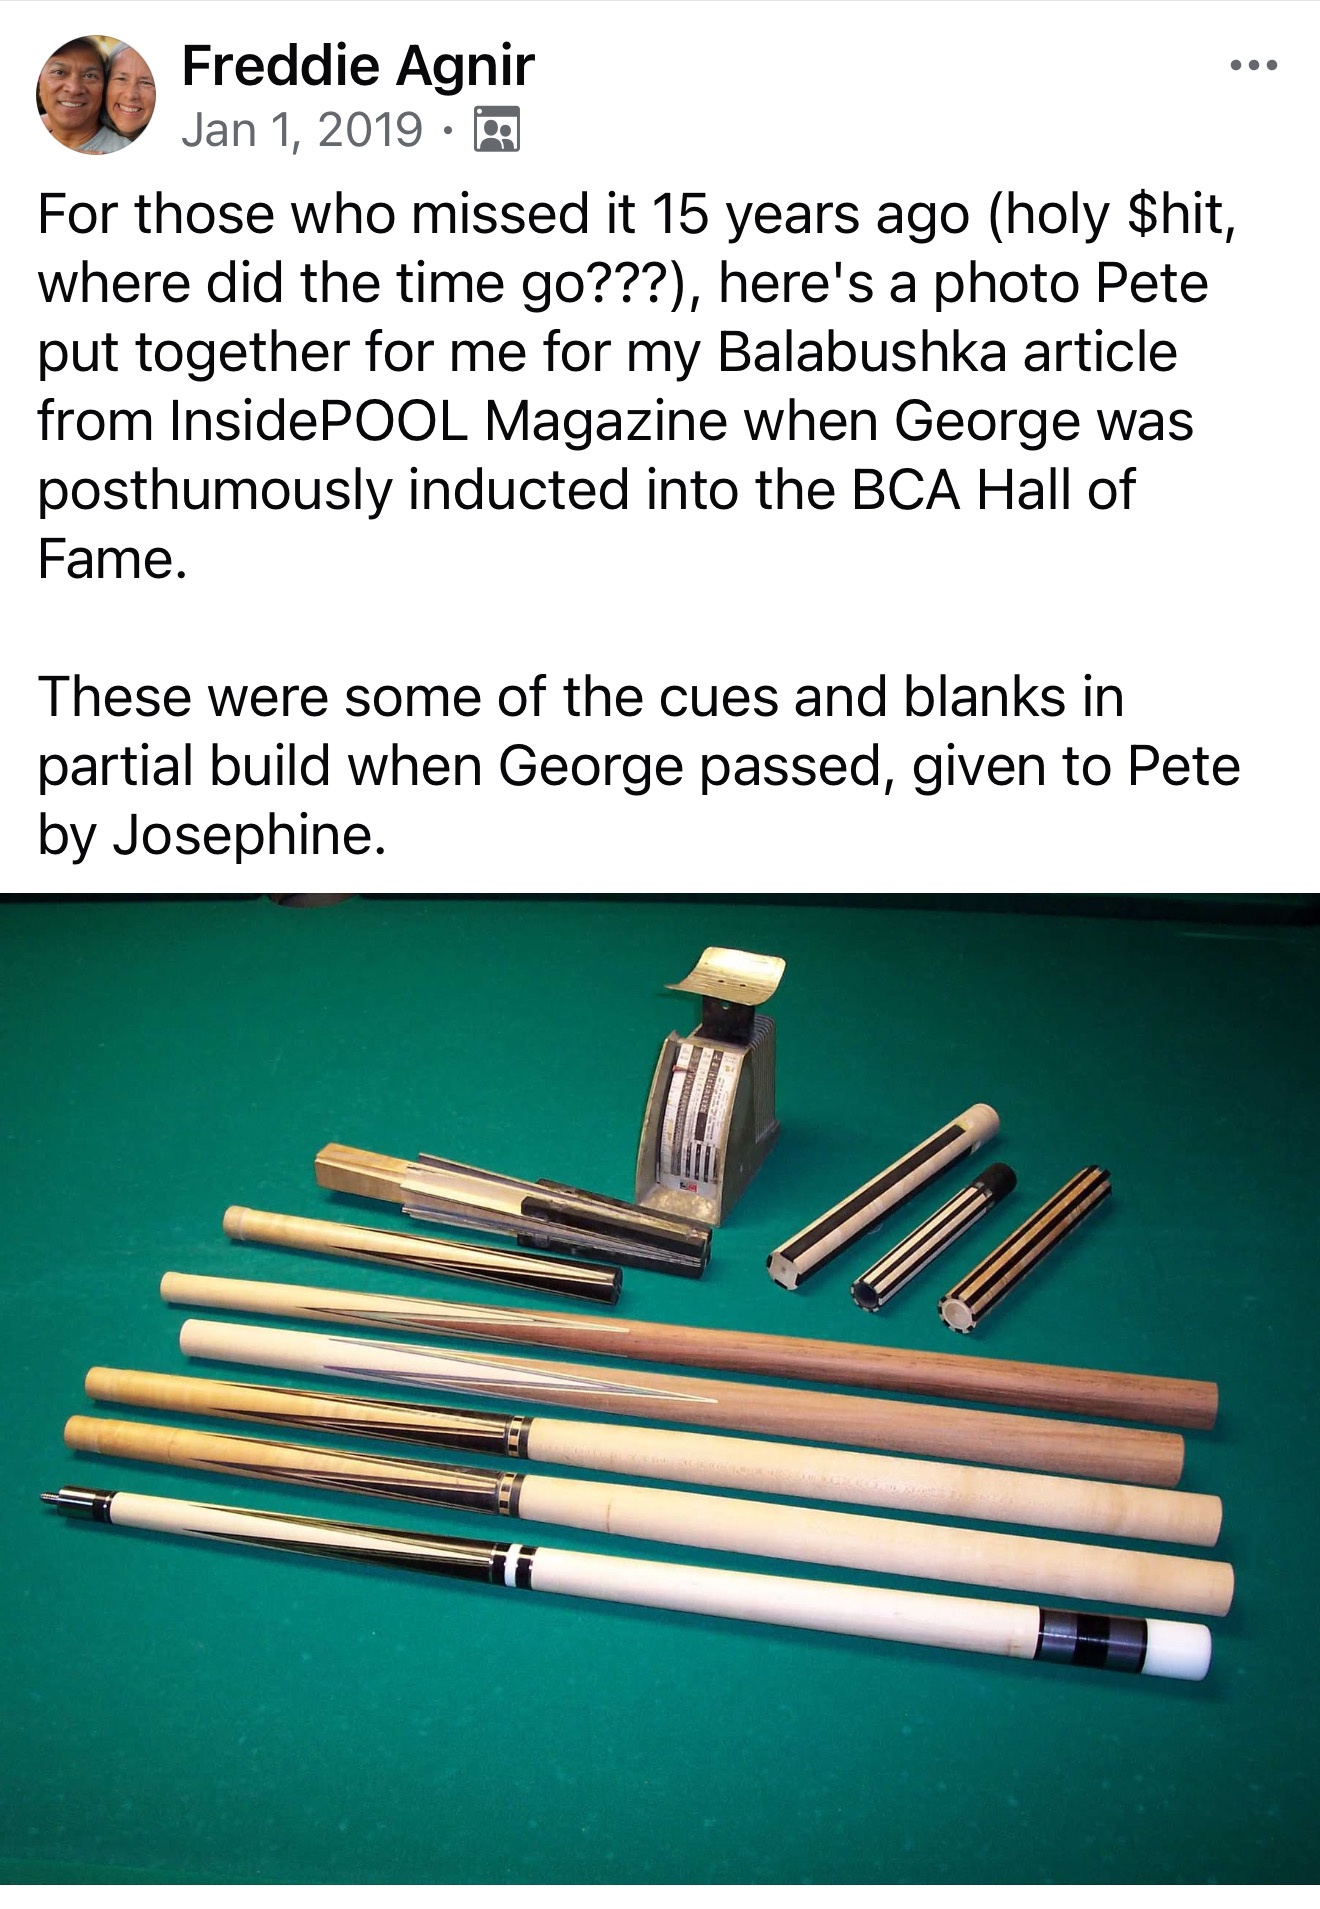
This is what George ordered from Burton Spain, John Davis and Gus Szamboti.
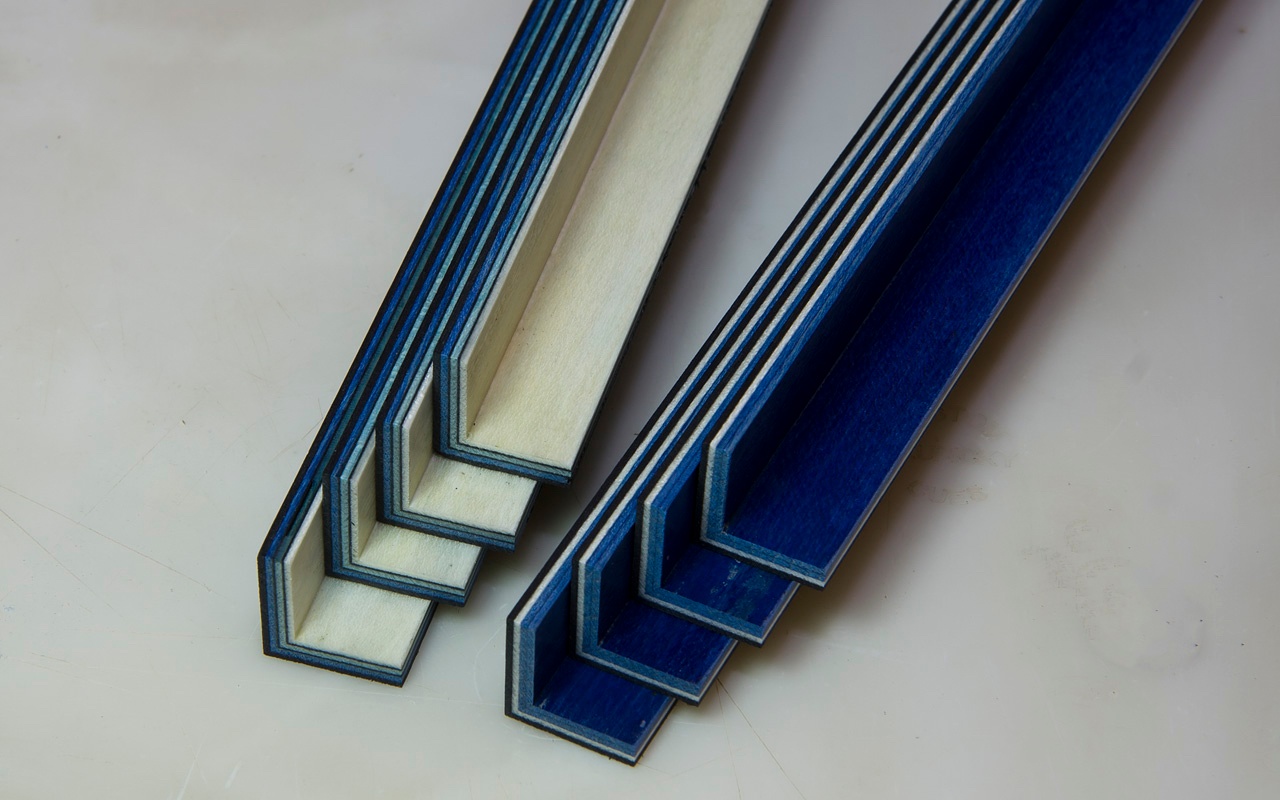
Below is a method of taking flat pieces and then gluing them into a 90 degree right angle. Better technique is to cut the veneers in to 90 degrees from solid wood, but that is more expensive technique.
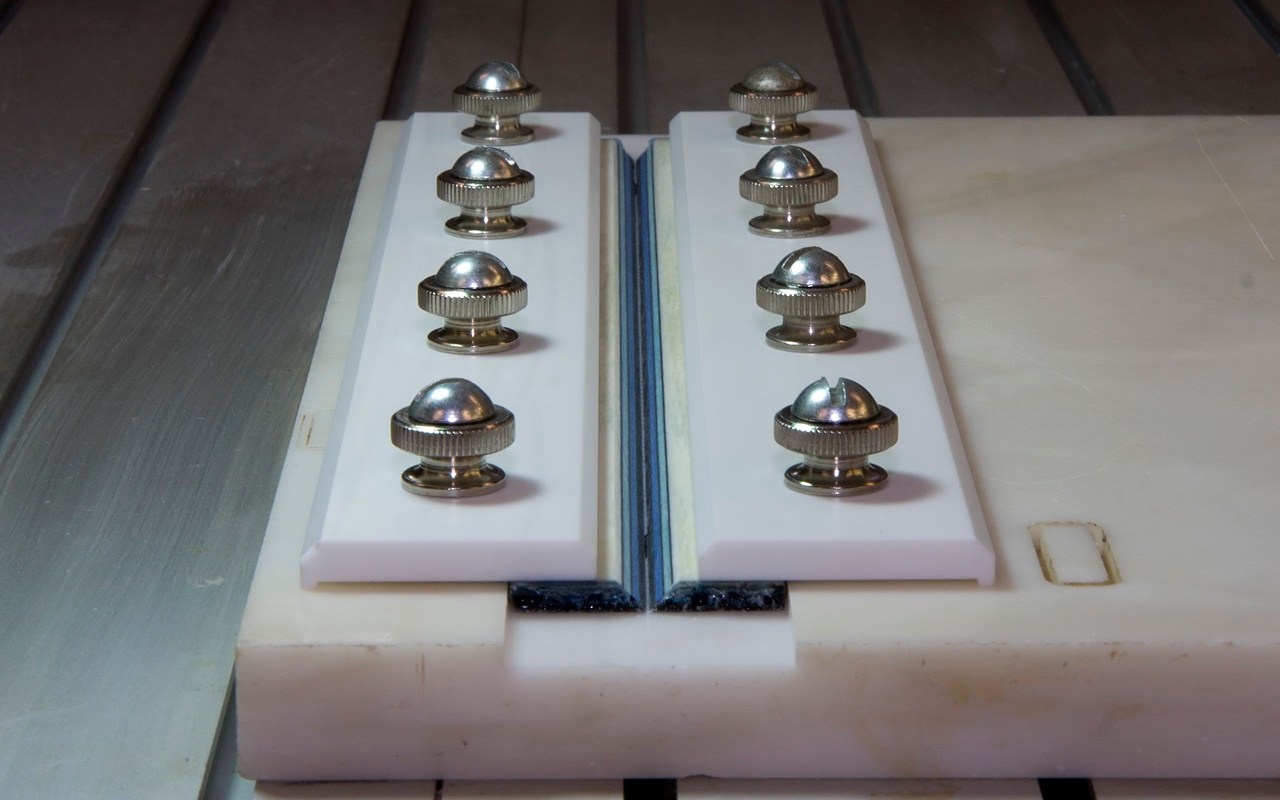
These are the basic components.
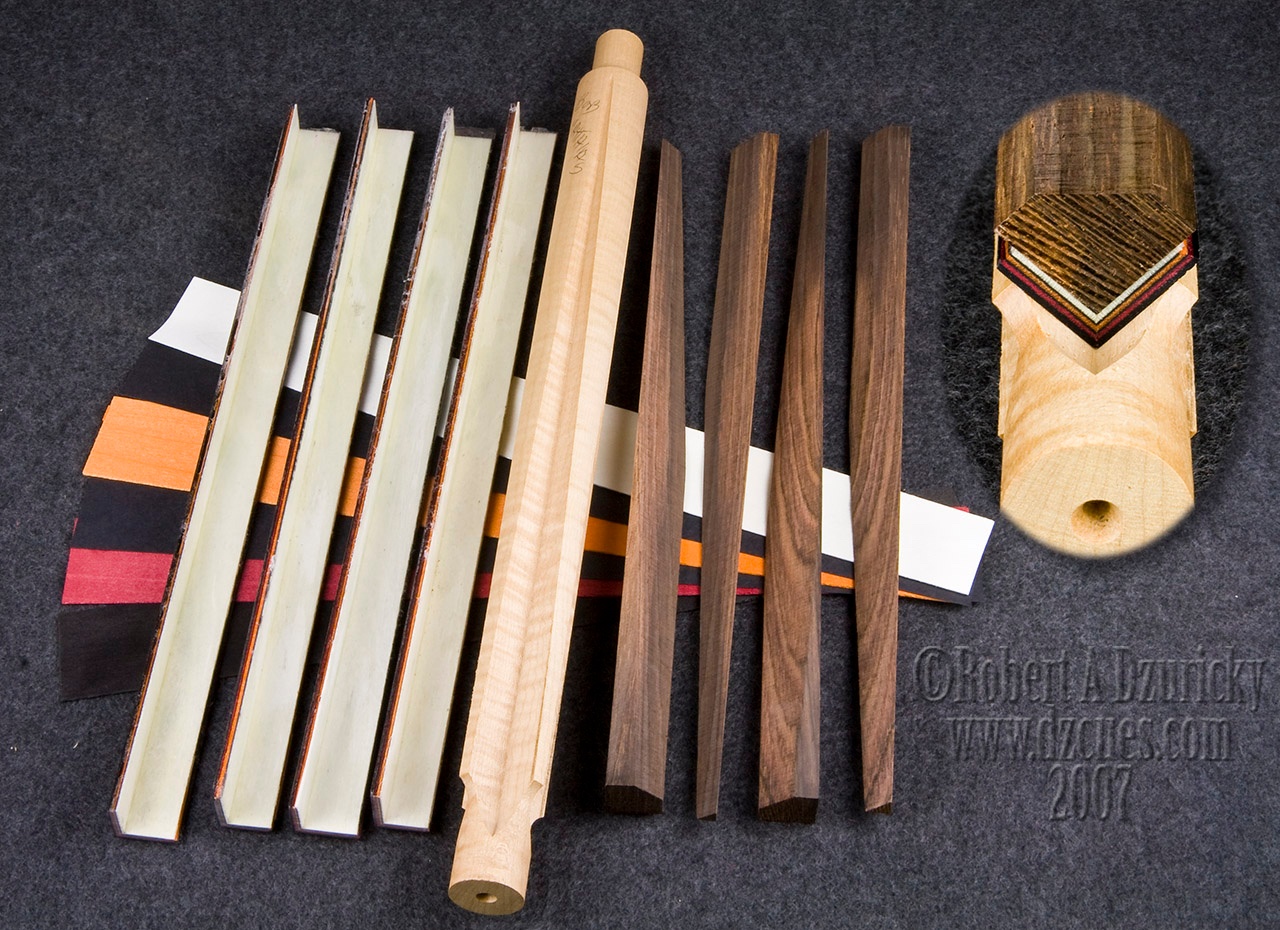
These are the finished veneers
Often the center of a point is a solid wood piece that sandwiches the above veneers to the main forearm.
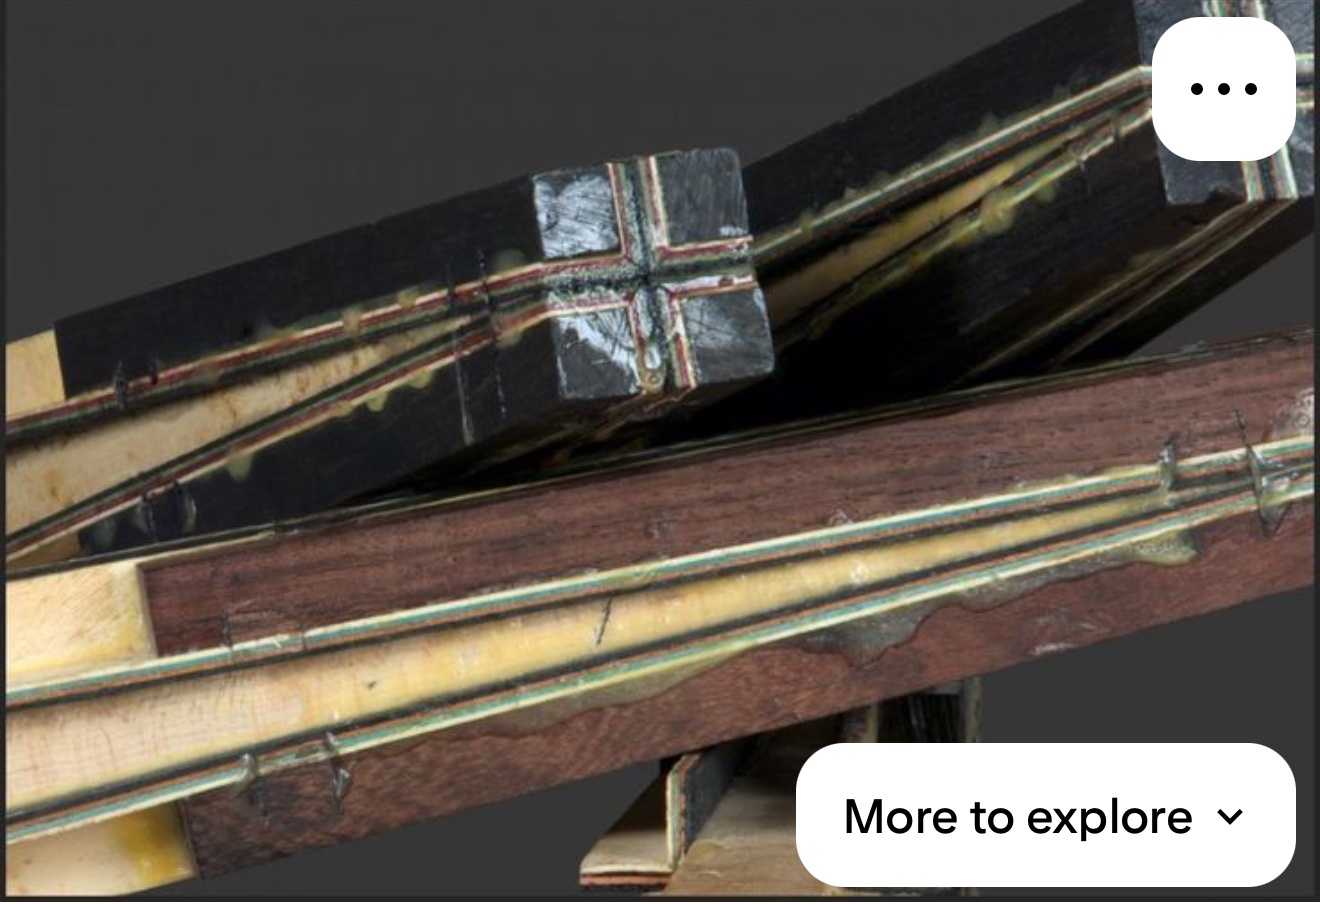
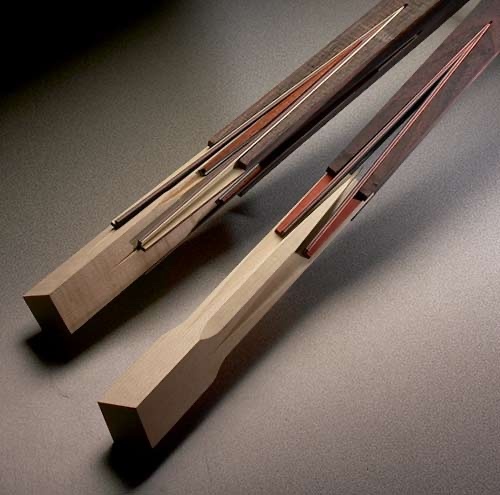
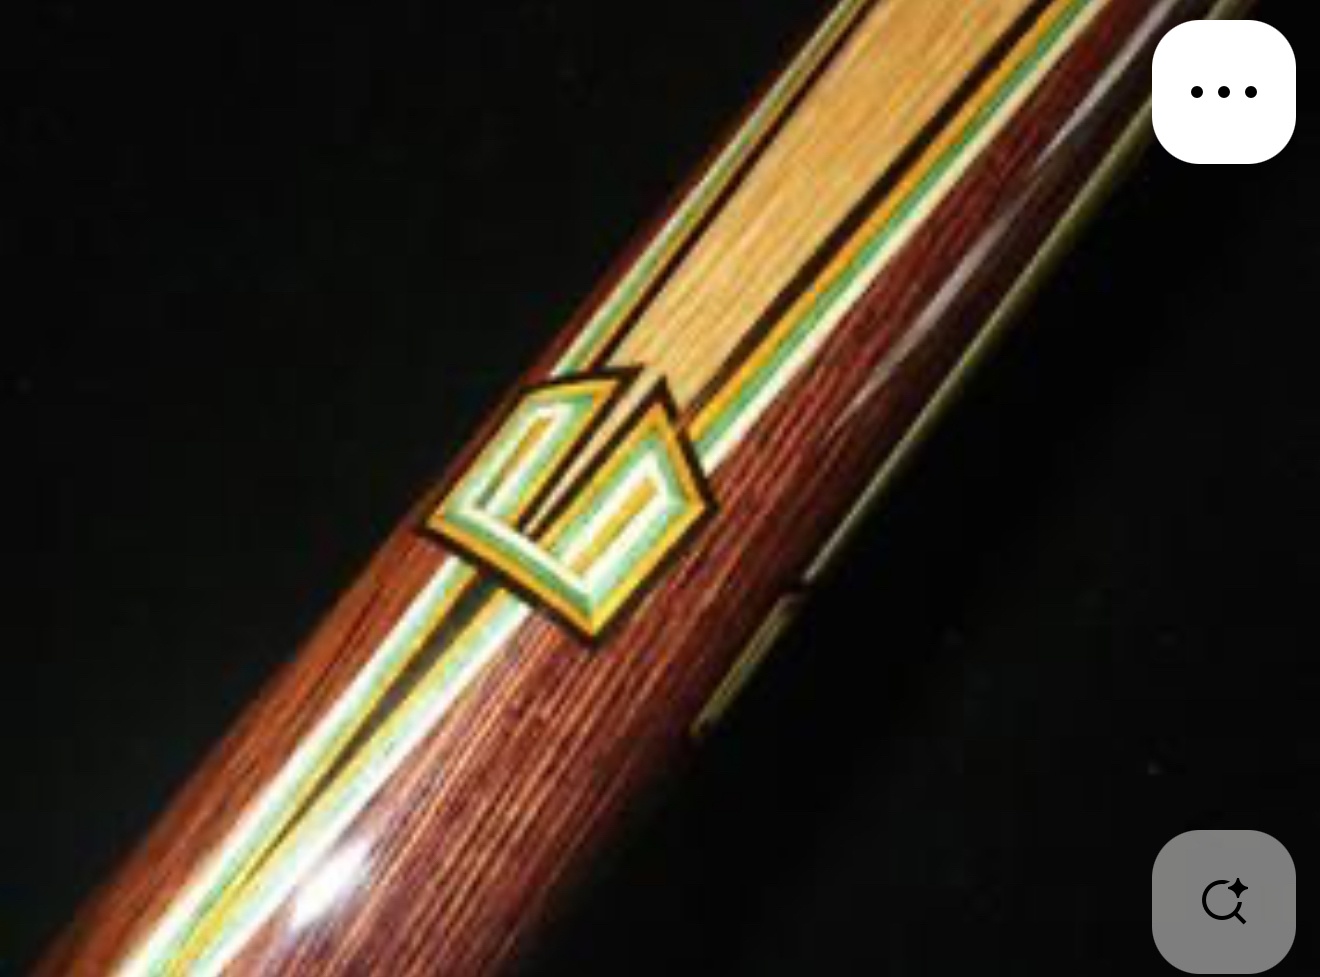
This is what the points look like when done on a finished half splice forearm that George used. Below is a modern example and not an actual balabushka part. The veneers are made of dyed maple sheets in George's time and sometimes construction paper on modern cues. The glue used to assemble the points absorbs into the veneers and makes it harder. But, the cue also has a different feel than a full spliced point. Still solid hitting but less pinging sound and may feel slightly cushioned compared to a solid piece of wood. With George's cues it's part of the complicated formula for his distinctive feel.
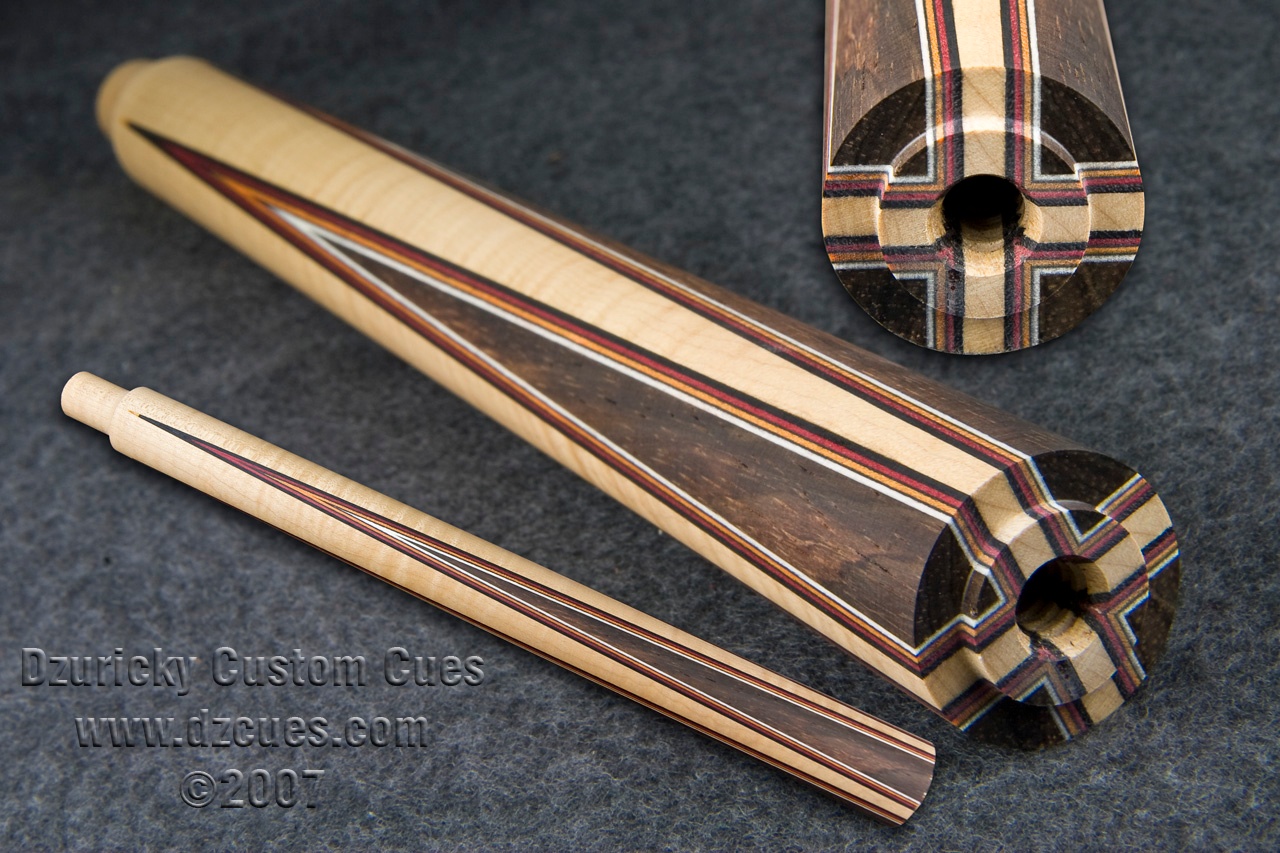
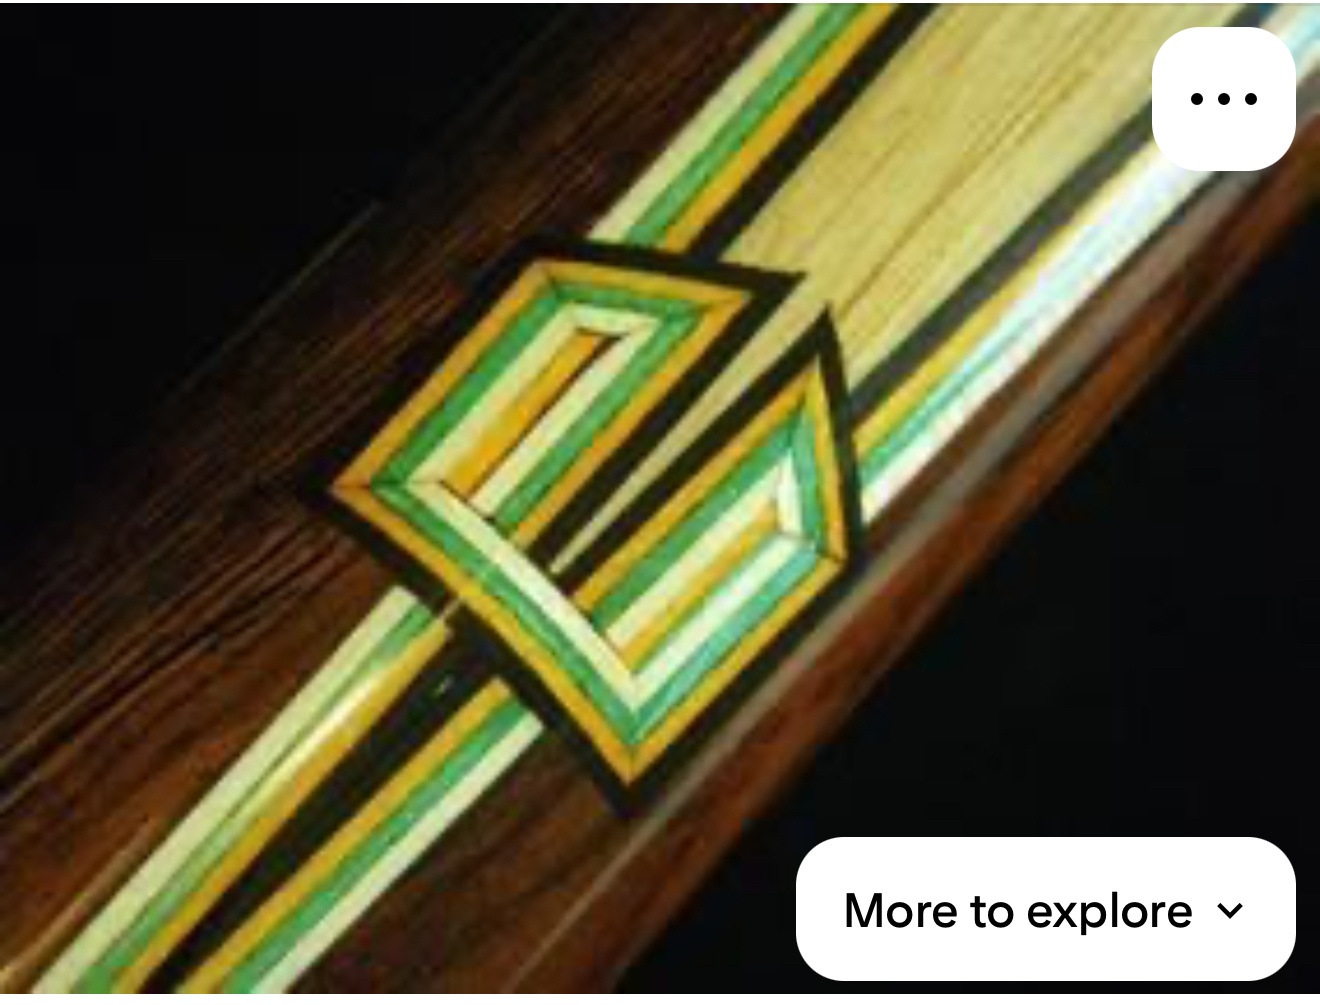
Modern traditional cuemakers can even do this incredibly difficult work, without a computer CNC machine. Not sure how the knot was made. I think it's impossible but there's some secret technique there. The knot itself is obviously inlaid, but it's not over a simple point. I think it's a zig-zag (two "w" shaped cuts) cut full splice and the knot is an inlay over it to make it look this way.
I won't go into all the modern CNC techniques available now like Recut Points, pantograph inlays, floating points, fading points, laser cut, and inlaying into polyurethane. I don't consider these on the same level as a skilled craftsman hand cutting each layer of color out of wood.
How master cuemakers made blanks for George Balabushka

I've played with a handful of full-splice cues, pretty sure never . . .
Video Links: I follow Studiotronics, he's about as high tech as it gets. Shows you how to build half and full splice cues. He's a Master Builder.
I figured it was complicated, but I had no idea it was THIS complex!
Yes, without a real understanding of the work that goes into creating points