Dresdener Regulator: Decoration and Finishing
Manufacture

Dresdener Regulator: Decoration and Finishing

By Kong · Mar 5, 2009 · 25 replies
Kong
WPS member · Horological Meandering forum
25 replies7256 views0 photos
f 𝕏 in 💬 🔗

Kong presents the second installment of a detailed series on the creation of the Dresdener Regulator, offering a rare, in-depth look into the intricate processes of haute horlogerie. This segment focuses on the critical stages of decoration, including perlage and bridge finishing, providing a visual and technical understanding of the meticulous handcraft involved. The post, featuring contributions from Don Corson, highlights the precision and artistry required to achieve a high-quality watch movement's aesthetic and functional perfection.
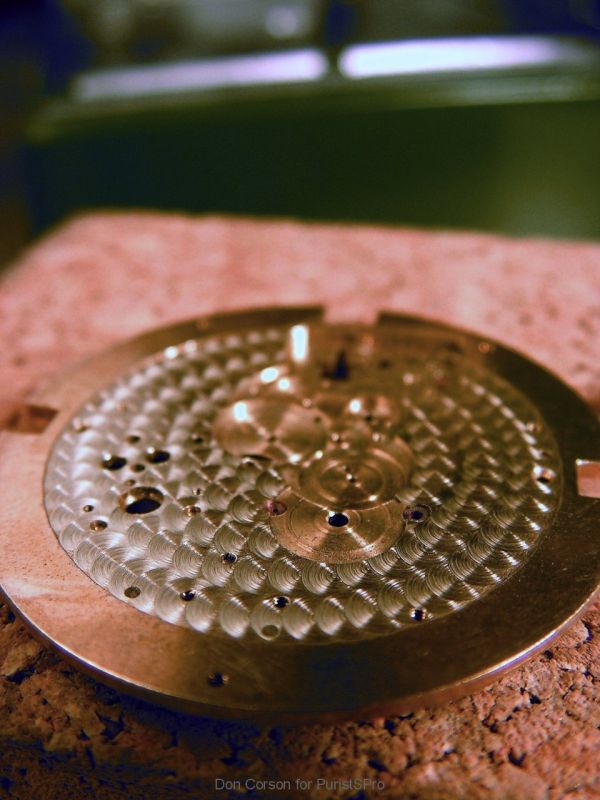
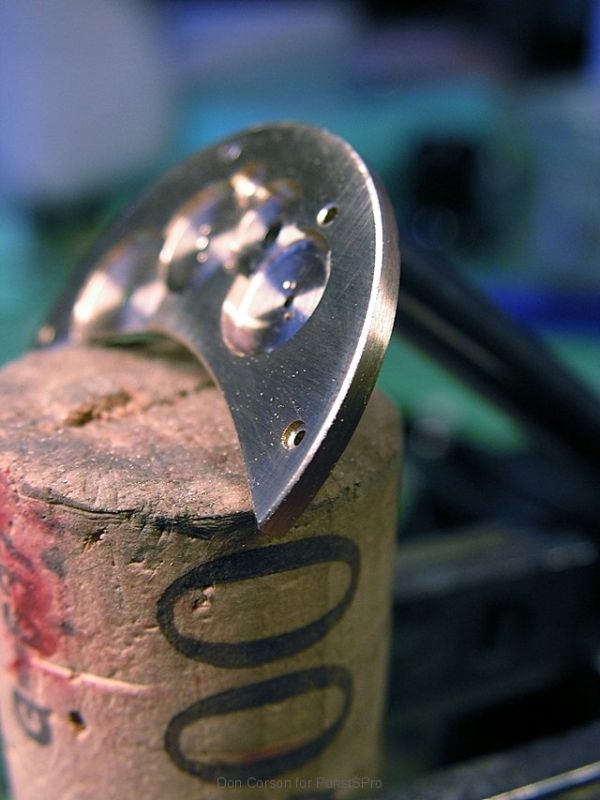
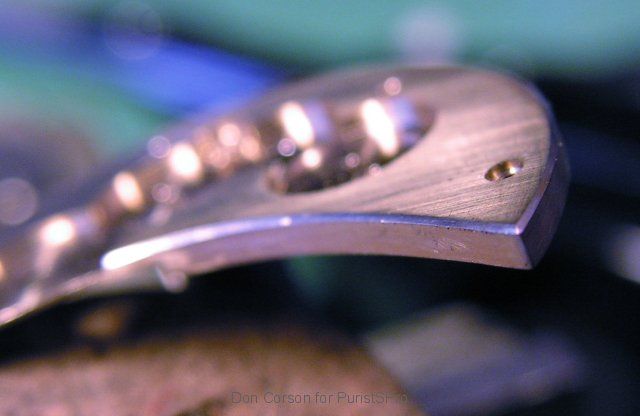
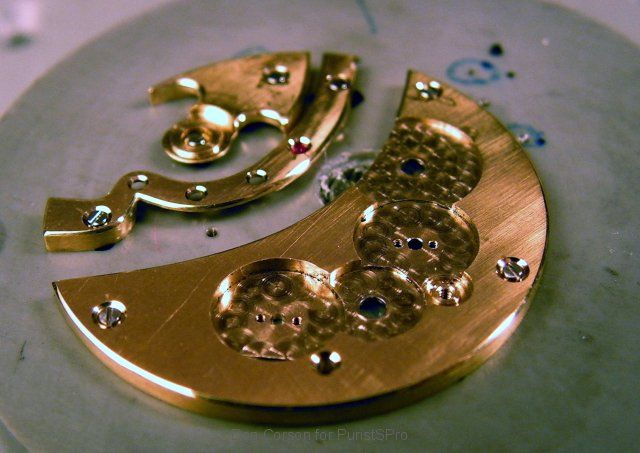
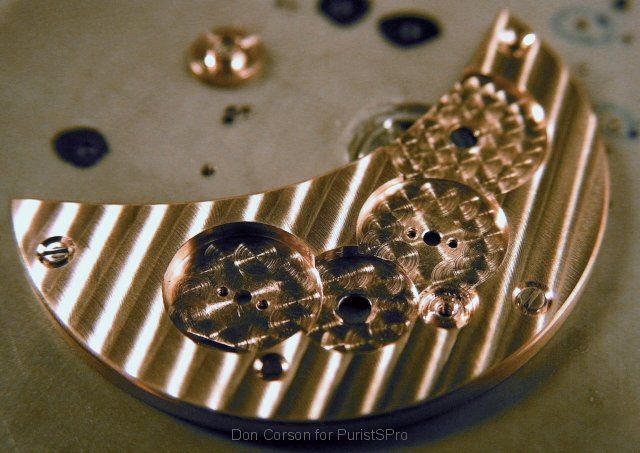
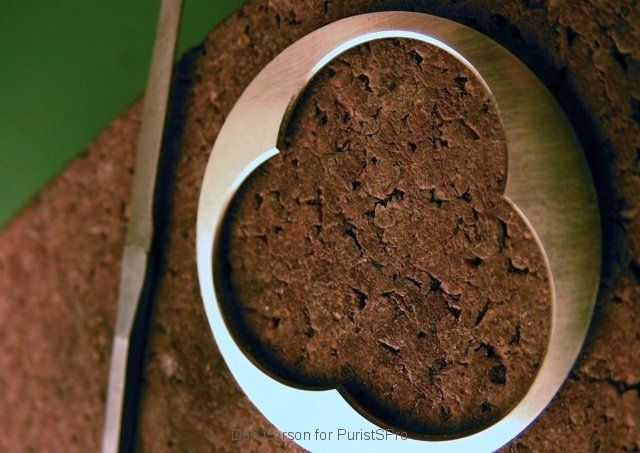
25 collectors discussing this on the WatchProSite forumJoin the Conversation →

I hope many of you enjoyed Part 1 of the making. (
Please click here to access Part 1 ).

Let's proceed with Part 2 ...


Decoration

Now that the parts for the Dresdener Regulator are made the decoration of the plate and bridges will be performed.

Start by forming the final shape of the bridges.


The perlage is done
at overlapping positions with a rotating tool.  However, the surface needs
to be prepared so no blemishes will be seen amongst the “pearls”.


The first row of “pearls” is placed overlapping slightly less than half of their diameter.


The second row is finished and the third just begin.


The dial side perlage is finished.


Now it is time to finish the bridges. 
Firstly,  cleaning up the edges.   The picture below showed the filing patterns left behind by a
coarser file.


Here after the second-cut filing and brushing.


For the bridge beveling, here are the tools used.  Starting from the right are the very fine flat and rounded files,
followed by the super fine flat and rounded files, Degusit files (synthetic ruby) and lapping films (in various grades) to achive mirror polish.


The bridge beveling starts by forming the bevel with a very fine file and cleaning that up with a super fine file.


Then the Degussit files and lapping till mirror finish with 3 different grades of lapping film.  The picture shown is after the 9 micron lapping film.


Continue till the bevel is perfectly polished.  This is just missing the final high luster polish with diamantine.


Next is to cut the jewel countersinks…


followed by polishing with diamantine on a wood polishing tool.


The bridges are screwed to a fixture for the côtes de Genève process.
Note that the surfaces are almost polished so that no blemishes will be seen through the côtes.


Côtes de Genève are made using a slightly inclined tool that ensures a distinct line at one side
and then moving the workpiece in a linear pattern under the tool.
Here 3 stripes are done.  You can see the distinct line at the right and the curves running out to
the left.  The next stripe will cover that ragged edge to the left.


7 côtes were done ...


The finished barrel bridge.


The dial frame is treated in the same way as the bridges; polished bevels and then côtes de Genève. 
The same plating will also be given to the watch, dial side and movement side
to give a uniform decoration.

Here initial filing of the bevel…


followed by the same 5 intermediate steps as with the bridge beveling.
The final polishing with diamantine…


followed by the côtes de Genève.


Here are all the pieces to be plated in ruthenium-anthrazit.


Ready to ship off to the plater...


After a couple of days, the parts are back in a nice warm charcoal color. 


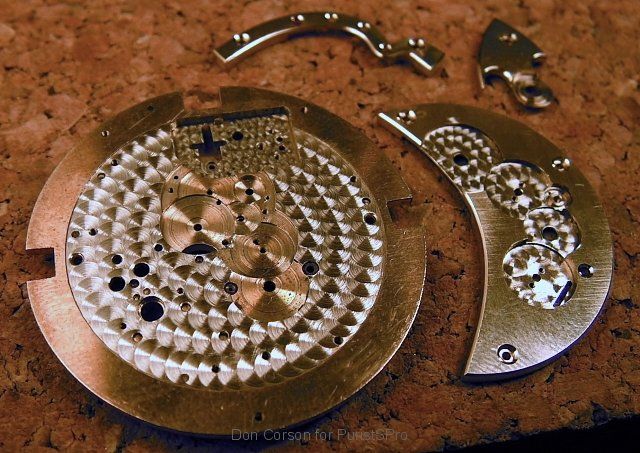
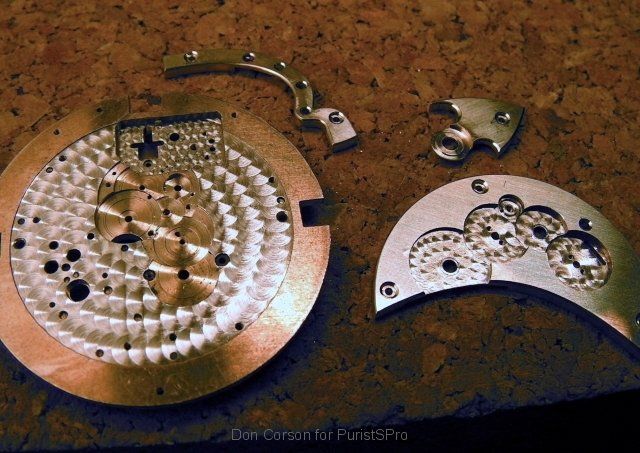
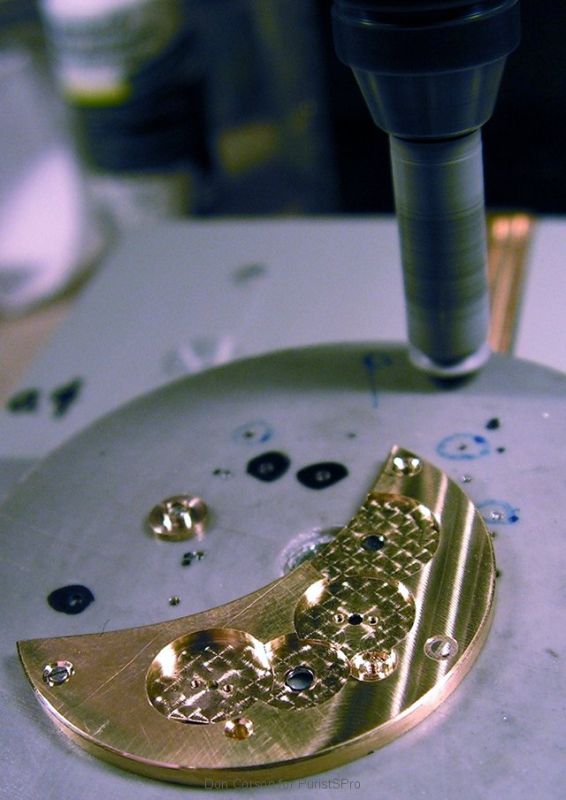
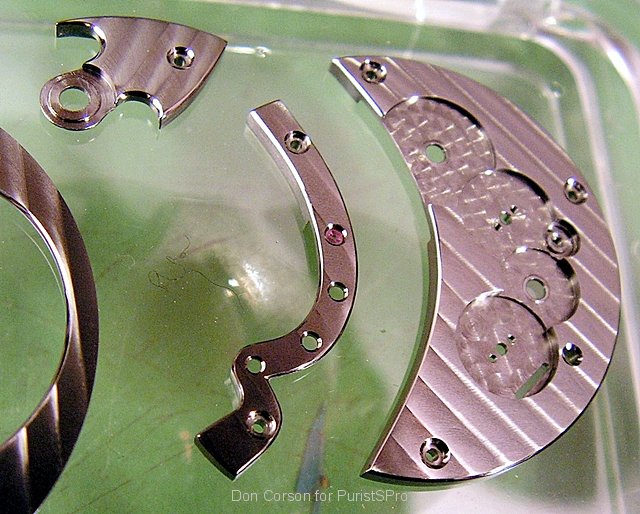
The re-assembly will start after some more parts, like the wheels, are finished in the next installment.

Stay tuned for the Part 3!    (Please  click here to access)

  This message has been edited by AnthonyTsai on 2009-03-05 09:32:14 This message has been edited by MTF on 2009-03-11 03:16:41 This message has been edited by Kong on 2009-03-12 09:15:01 This message has been edited by Kong on 2009-03-19 10:27:00

Key Points from the Discussion

Advertisement
The Discussion
OR
Ornatus-Mundi
Mar 5, 2009
What an outstanding and informative series...

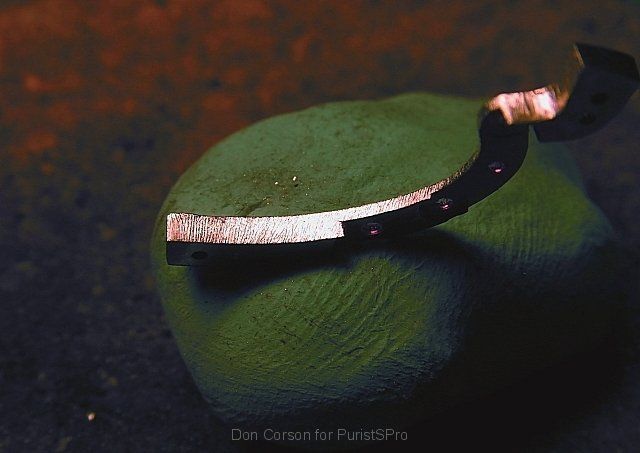
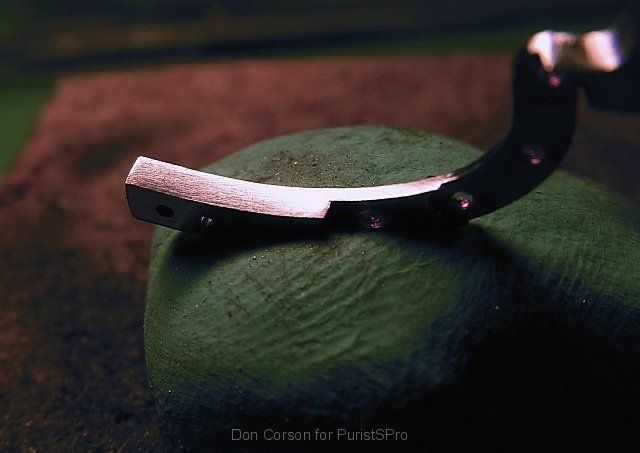
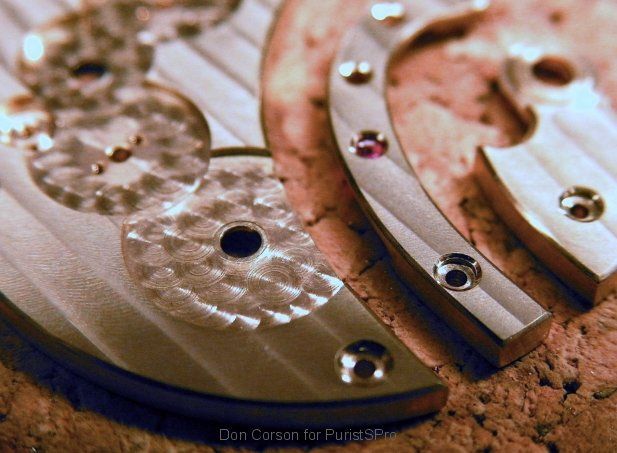
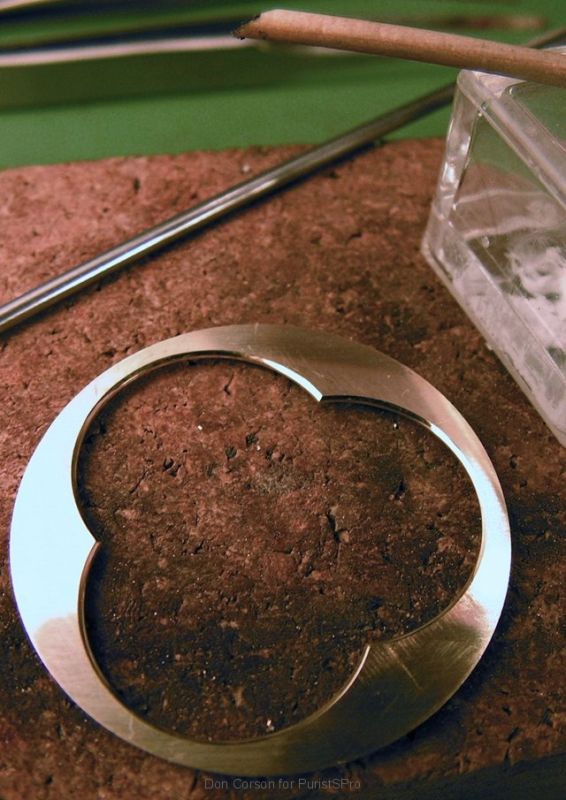
Thanks to Don and to Kong for posting this. Don, may I ask you how you prevented the dial from bending during the bevelling work? Any slight deviation from an exact plane could show when applying the Côtes de Genève , I assume. Best, Magnus

OP
Ophiuchus
Mar 5, 2009
Fantastic work! Polishing mediums...

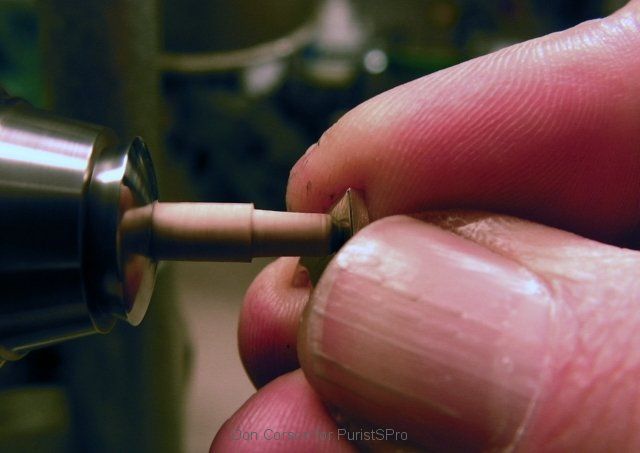
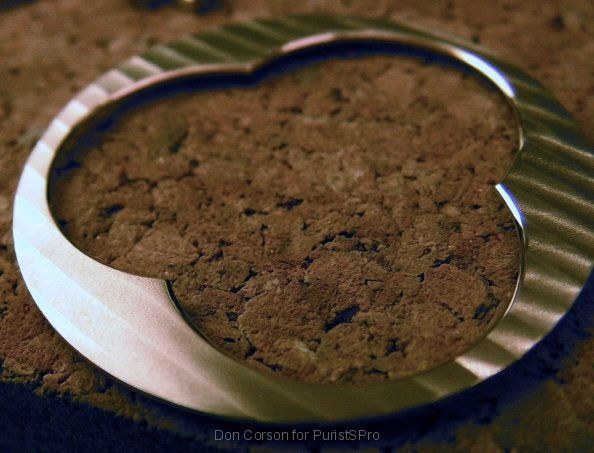
Gorgeous work here Don. You really astound! Noticing you go into micron level diamond polish, what level is your diamantine? You work the polish with the file at the same time? That wood you use for polishing your jewel countersinks- would I be correct if I said that was boxwood? Boxwood polishes many metals quite well, just curious what an independant artisan prefers here. I'm not a polishing specialist when it comes to metal, as you are here, but when I'm polishing my rubies, I only use diamon

DO
DonCorson
Mar 6, 2009
Polishing

Hi Ophiuchus! I don't use diamond abrasives at all. Diamantine is aluminum oxide. I am still searching for the perfect polish and it depends on the material being polished, of course. I have the best results on steel with a final polish with Diamantine, on gold I use jewelers rouge for the final polish, on brass or maillchort I am undecided and have had good results with rouge, diamantine and blue diapol which is actually for platinum, but I have been told it is the best for brass so I tried it.

DX
dxboon
Mar 5, 2009
I almost don't know what to say...

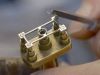
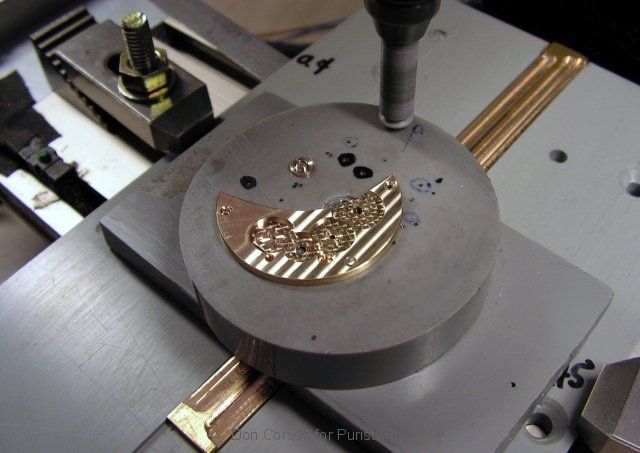
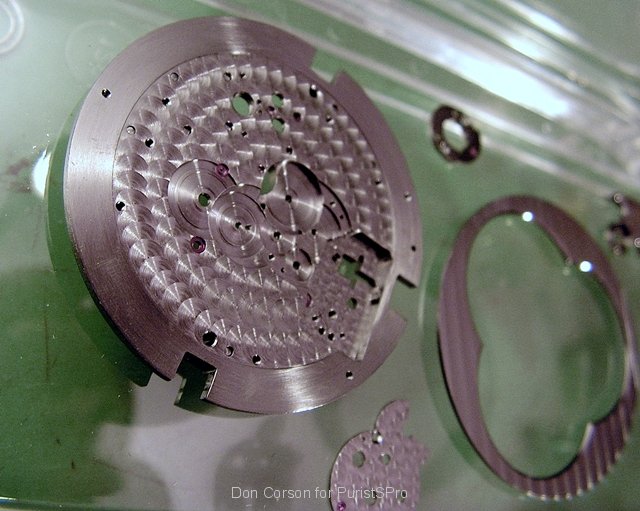
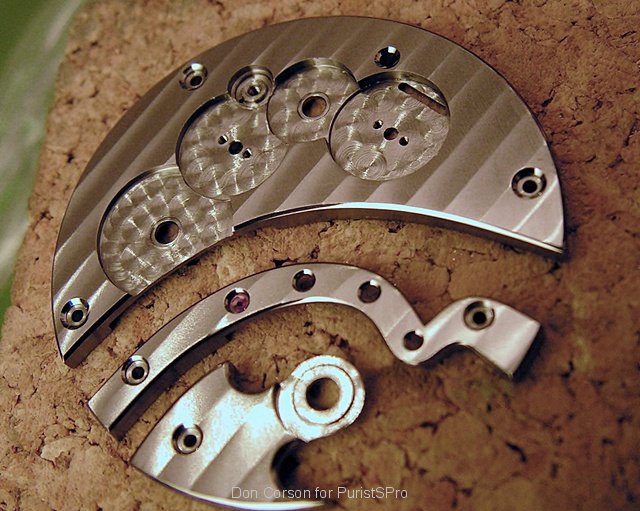
...it's so fascinating to watch the process unfold.  Thanks, Kong, for the post.  And, Don, I can't tell you how impressed I am to see the steps you take in finishing each individual element of your watch.  I wonder where you house all the machines and tools it must take to create your little masterpieces!  In the 8th or 9th photo down it appears as though you might be using modeling clay, or similar material, to hold the bridges in place in order to photograph them.  That's clever!  I'm super e

AL
Allen
Mar 6, 2009
Excellent!

I took my time studying each picture. It was very enjoyable. Especially after seeing the completed watch. Thanks for the excellent documentation!

DO
DonCorson
Mar 6, 2009
Hi Allen! ...

You saw one similar to this. This is a new watch that is now still in the making. This evening I am repolishing the hands as the rhodium plating didn't come out well. There are funny spots in the plating. I didn't see them at first with the naked eye, but under a loupe they are a no-go. Back to the platers next week. The joys.... Don

Continue the conversation

This thread is active on the Horological Meandering forum with 25 replies. Share your knowledge with fellow collectors.

Join the Discussion →