
DonCorson
[AHCI]
3358

Workshop Report – Making a Pinion by Hand
In this workshop report we will see all the steps to making a pinion by hand. This is how pinions are made for prototypes and small quantities without recourse to the automated machines for big quantities.
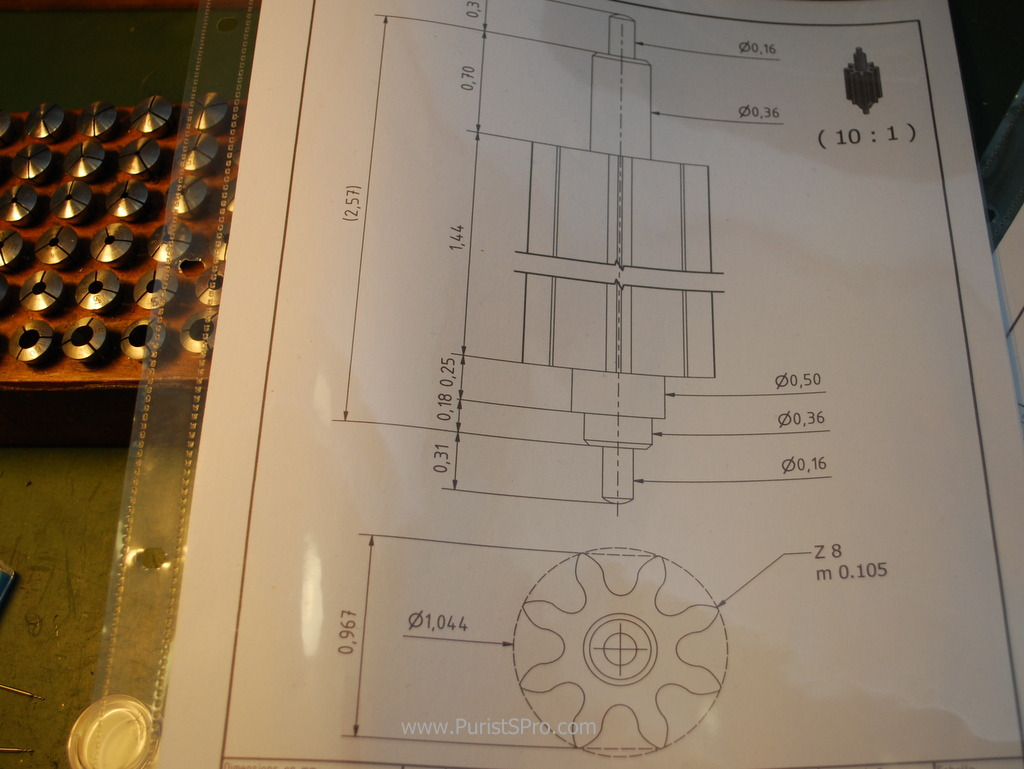
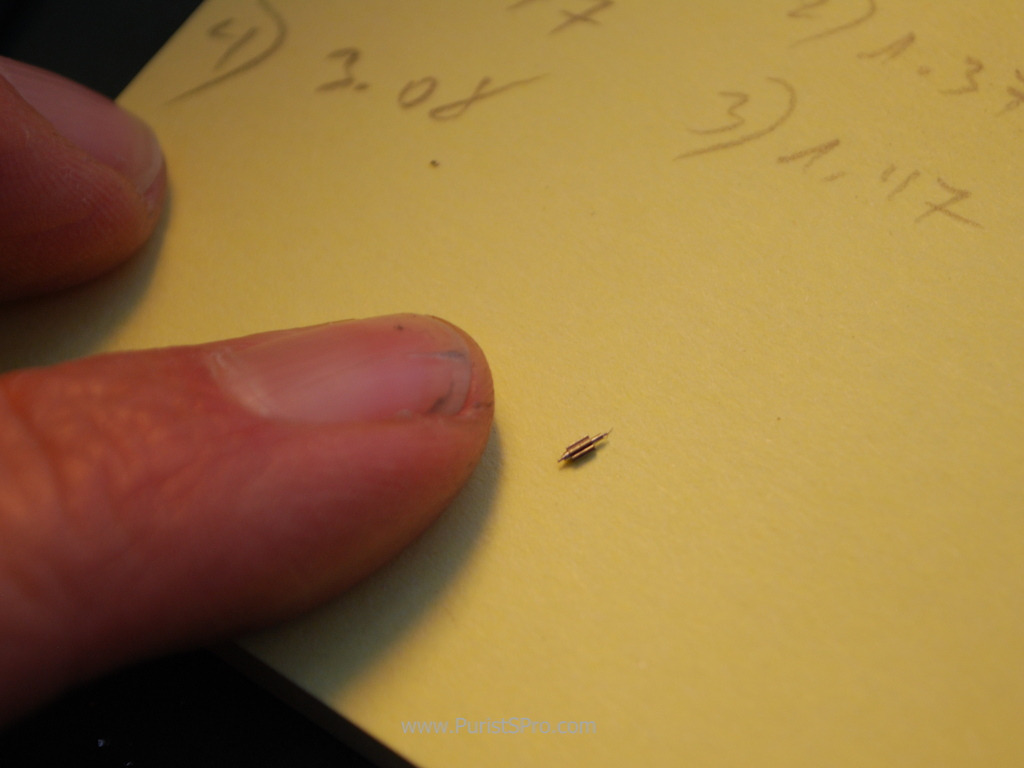
Below we see the finished pinion, an 8 leaf pinion of module 0.105mm. The overall length is 3.19mm and the maximum diameter over the teeth is 1.044mm. Now let us see all the steps in its production.
The raw material is a piece of 2.5mm round bar steel. The steel used is Sandvik 20AP. From the 20AP data sheet:
“Sandvik 20AP is a hardenable, free-cutting carbon steel characterized by excellent machinability and high hardness, high wear resistance and exceptional dimensional stability after hardening. The material is suitable for long, narrow components with tight tolerance.
Service temperature -50 to 100oC (-55 to 210oF). Prolonged service at elevated temperatures causes decreased hardness when used in the hardened and tempered condition.
Chemical composition (nominal) %
C=1.0 Si=0.2 Mn=0.4 P <0.030 S=0.05 Pb=0.2“
This steel is used by almost all watchmakers for pinions and such, also the big quantity brands.

The first step is to cut off a piece of bar of the appropriate length.


The blank is then turned down to the correct diameter. As the biggest portion of the material is just used to hold the piece in the chuck of the lathe and gear cutting machine each blank is prepared to be used from both ends.

Several pinion blanks ready for cutting.

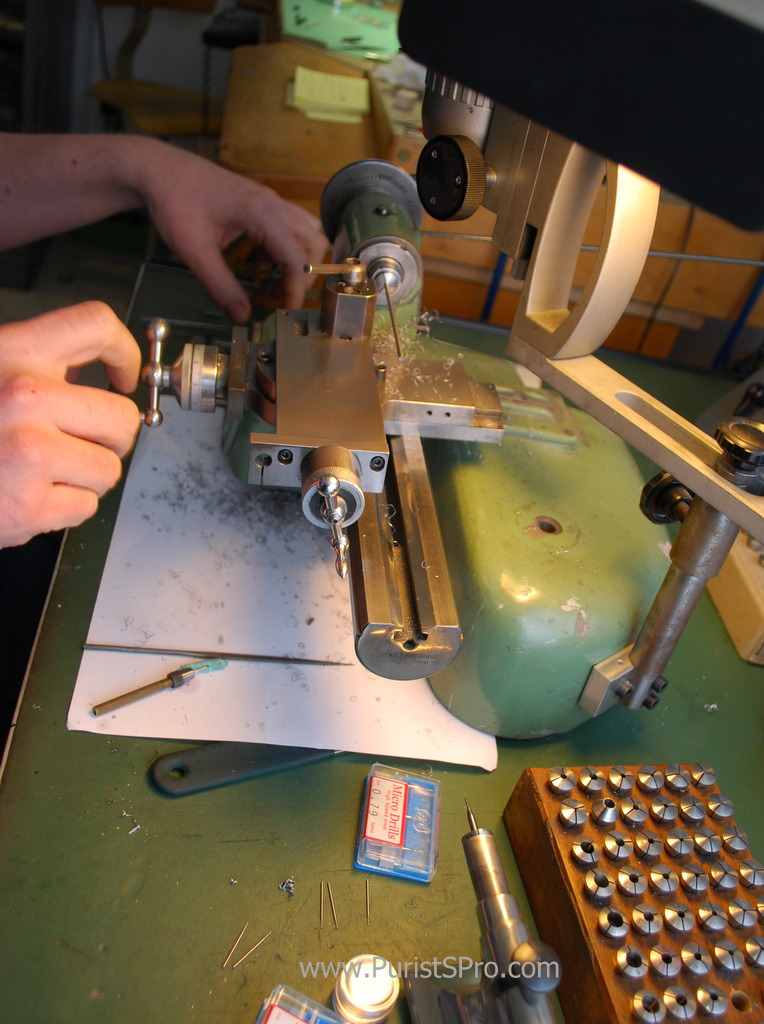
The blank has been mounted in the collet of the gear cutter.

The first thing to do is use a dial gauge to be certain that the blank is well centered. The value shown on the gauge should not change when the blank is turned.
Here we see the cutter cutting the tooth form, one tooth at a time.

With the lower lever the cutter is moved to cut the length of the tooth. The index wheel in the back is used to turn the blank the correct amount between the teeth. The cutting itself goes quite quickly, what takes time is setting up the machine so everything is perfectly centered and the cutting depth is correct.


Here we see the future pinion just as it comes from the cutting machine.
Checking the overall diameter that the cutting has gone well.

This type of cutter is known as a module cutter. With this cutter each tooth is cut separately. As you can imagine every watch has gears of several sizes, for each size a different cutter is needed. This is a professionally made cutter, with the large amount of teeth it can advance quite quickly in the material.

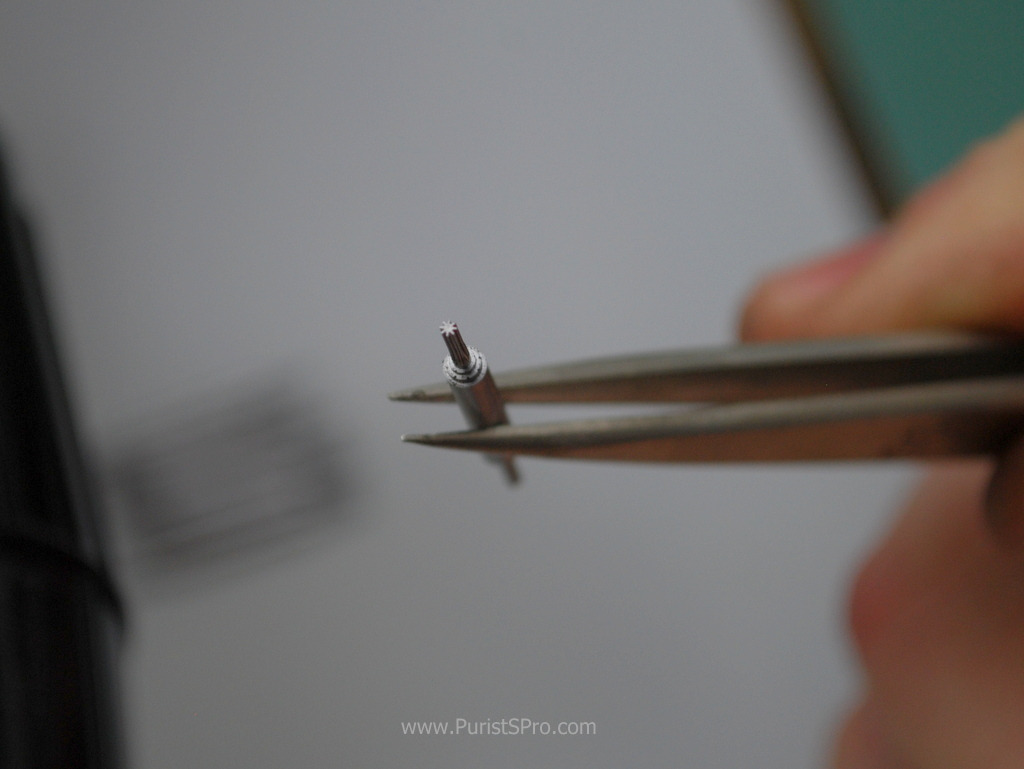
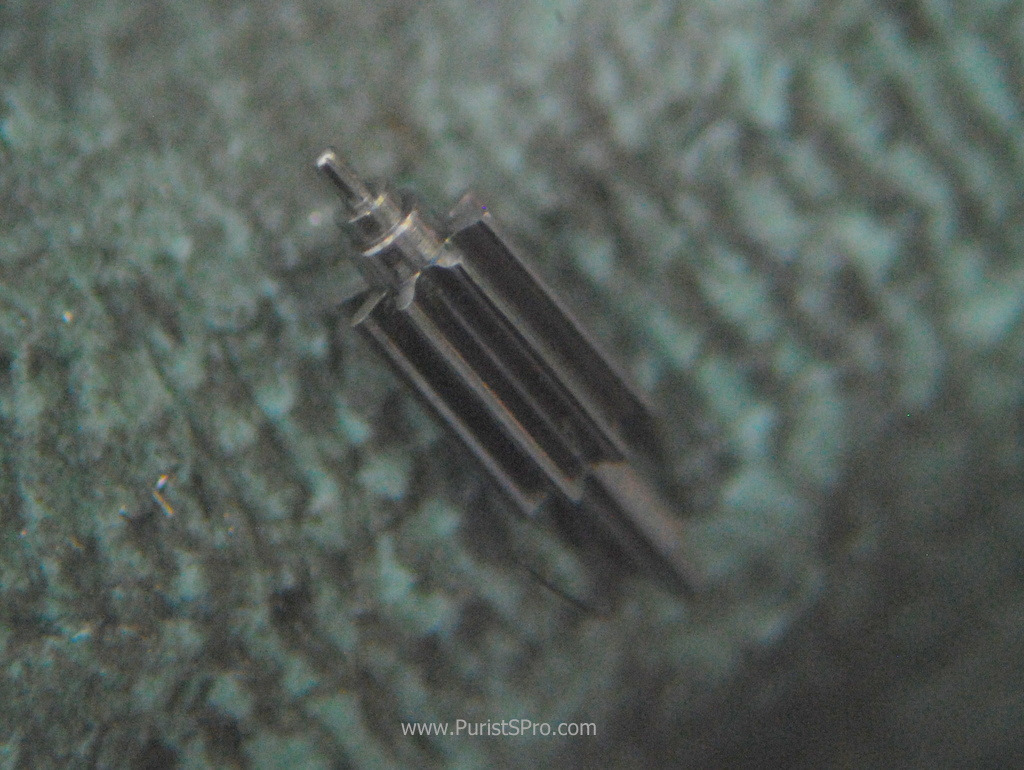
When the required cutter size is not available or not at hand a good watchmaker can make cutters them self. This is a custom cutter made by hand. Making such a cutting tool is very involved because the cutting angles and back releaf is very important for a good and clean cutting result.

Checking the result under the loop.

This is the drawing of the pinion we are making. We need this now to know how we must turn the axles.
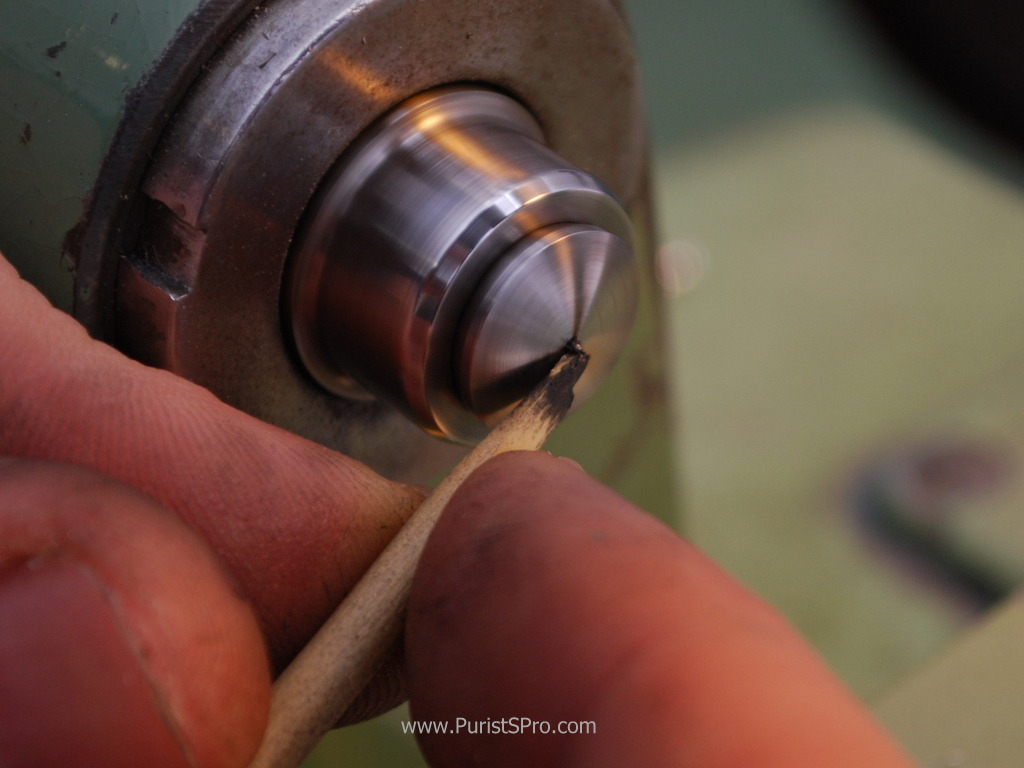
The blank with the cut teeth is chucked up in the lathe.

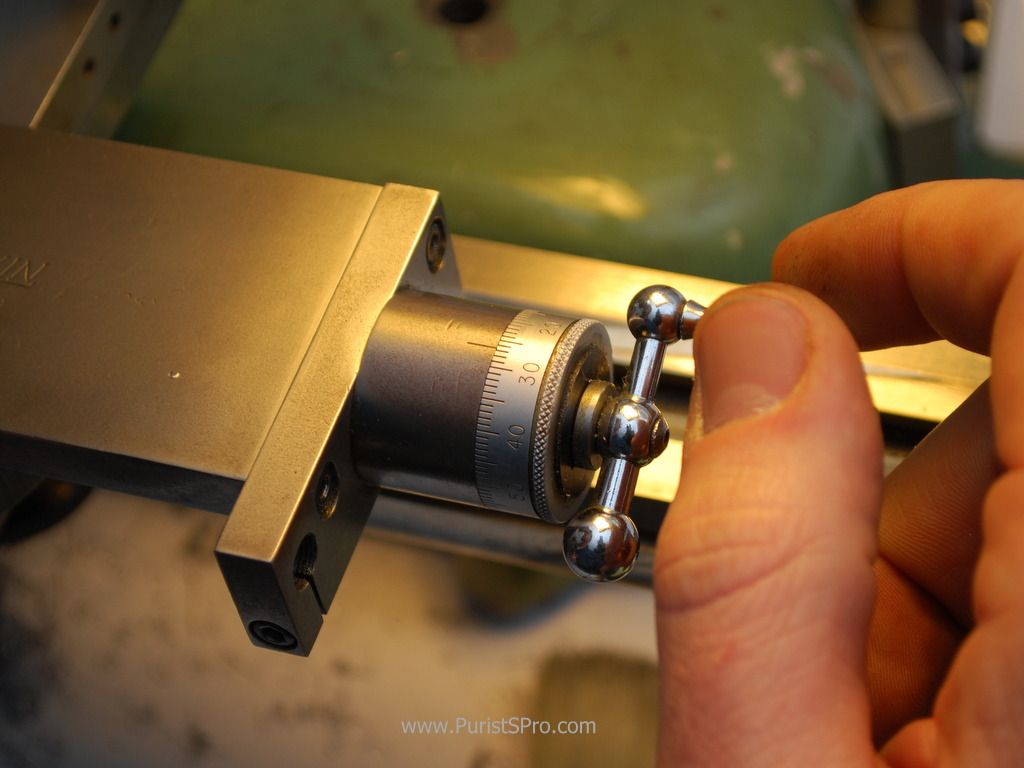
To get the precision we need we will be going by the dials on the lathe table. First zeroing on the pinion through the binocular microscope and then cutting the amount required using the dials.

Cutting the first portion of the axle under the microscope.

Checking the diameter with a micrometer.

The axle on one end of the pinion is done.

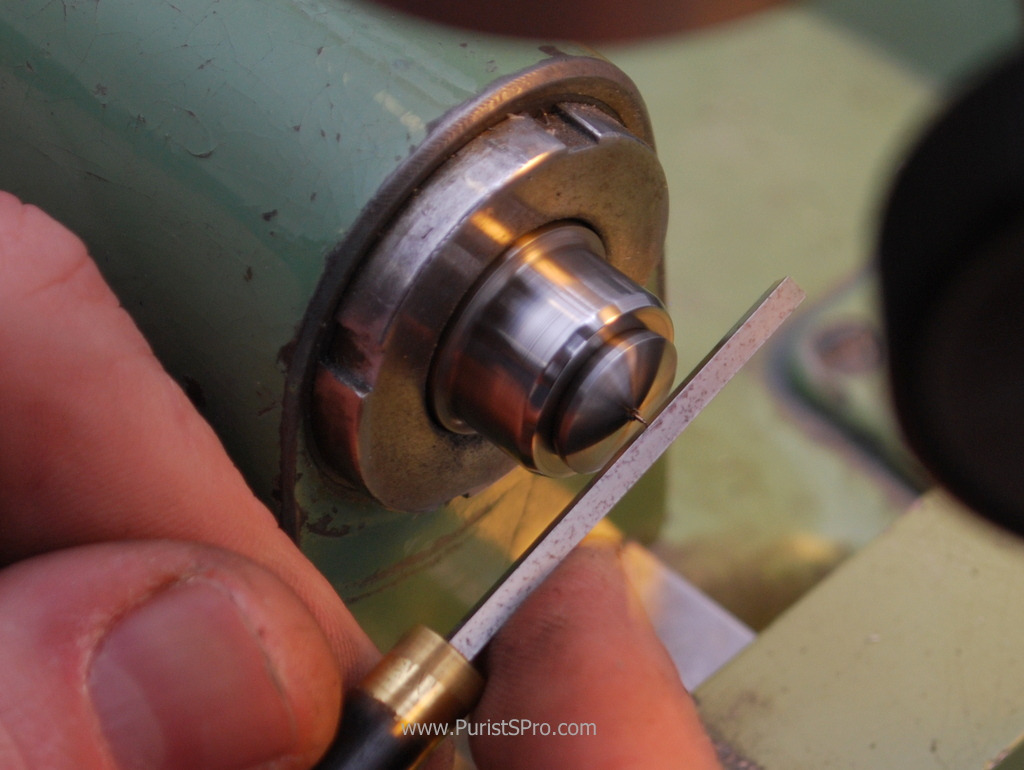
To retain the centering the axle on the other end of the pinion will be cut without turning the blank around. For this we need to use another tool, with the cutting edge on the other side and recalculate the distances we need to cut.


This micrometer is specially made for measuring in such cases. The feelers are very thin to get in between the teeth of the pinion and the rest material of the blank. The feelers of a normal micrometer wouldn't fit in between and would simply measure the diameter over the teeth.

The pinion is now ready to be cut off from the blank.

The machining is now done.
Now the finishing starts. Any burrs are removed under the microscope.

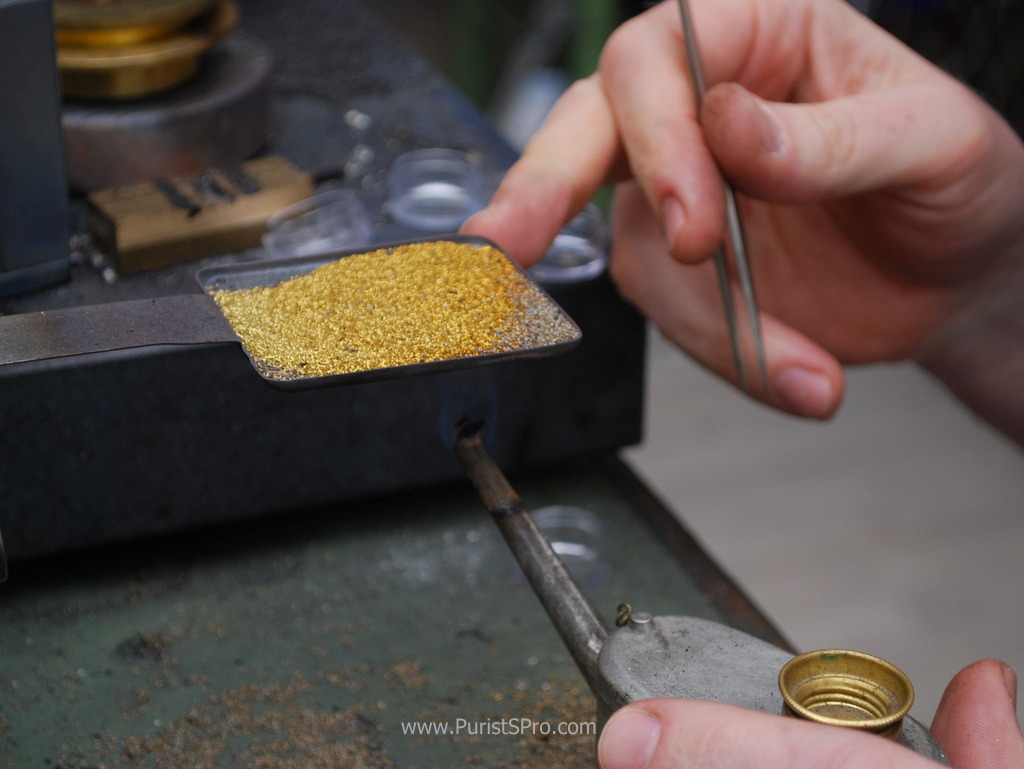
Now it is time to harden the pinion. The 20AP steel is delivered in a state that is good for machining. For its use as a pinion the steel needs to be hardened. To this end we srt by putting a couple of spatulas of coal power in a tube. Then drop the pinion in and cover it with some more coal powder.

This is then heated to cherry red in a propane flame.


What is the coal powder for, you ask? Well at the temperatures needed for hardening steel the steel itself starts to react with the oxygen in the air and starts burning. The coal powder starts burning at a lower temperature than the steel and consumes the oxygen around the steel piece. As the oxygen is no longer there the steel cannot burn and remains clean and intact. Industrial hardening operations do the same by simply doing the heating in a nitrogen gas environment instead of in air.

The tube and the pinion inside are cherry red ….

and are dumped into a glass of oil to suddenly chill the steel. This hardens the steel to glass hard. It is very hard, but also very brittle.

Fishing the pinion out of the oil with a magnet.

Cleaning in an ultrasonic bath.

Now it is time to anneal the pinion. This makes the steel less hard and less brittle. Annealing is one by hating the piece to a certain temperature. Fortunately steel takes on different colors as it is heated. This is a reaction with the nitrogen in the air growing a layer of magnetite on the surface of the steel. As the temperature rises this layer changes and the colors change. The color goes from straw to brown to indigo to dark blue, light blue, etc. Each color indicates a specific temperature and degree of annealing. We want to anneal a pinion to dark blue to get the optimal hardness. (This is the same procedure used for bluing screws and hands). Here we see the bluing pan filled with a layer of brass filings to spread the heat evenly.
Two pinions are among the filings above an alcohol flame...

they have just started to take on a light straw color...

getting close to indigo...

another check for dark blue under the loop.

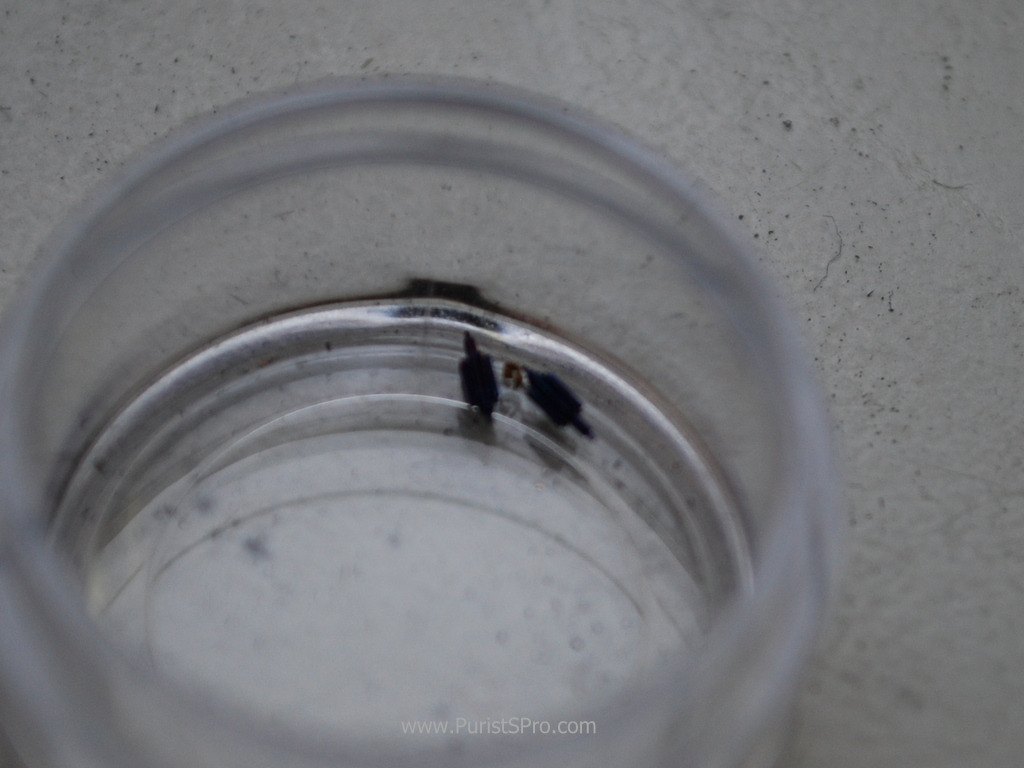
Here we see the two pinions annealed to dark blue.
Still not finished, we head on to polishing the teeth. This machine is for polishing the teeth of pinions with polishing compound on a wood disk. In the literature many watchmakers have their opinions for the best wood such a pear or boxwood. This disk is made of beach wood.

Setting up the machine.

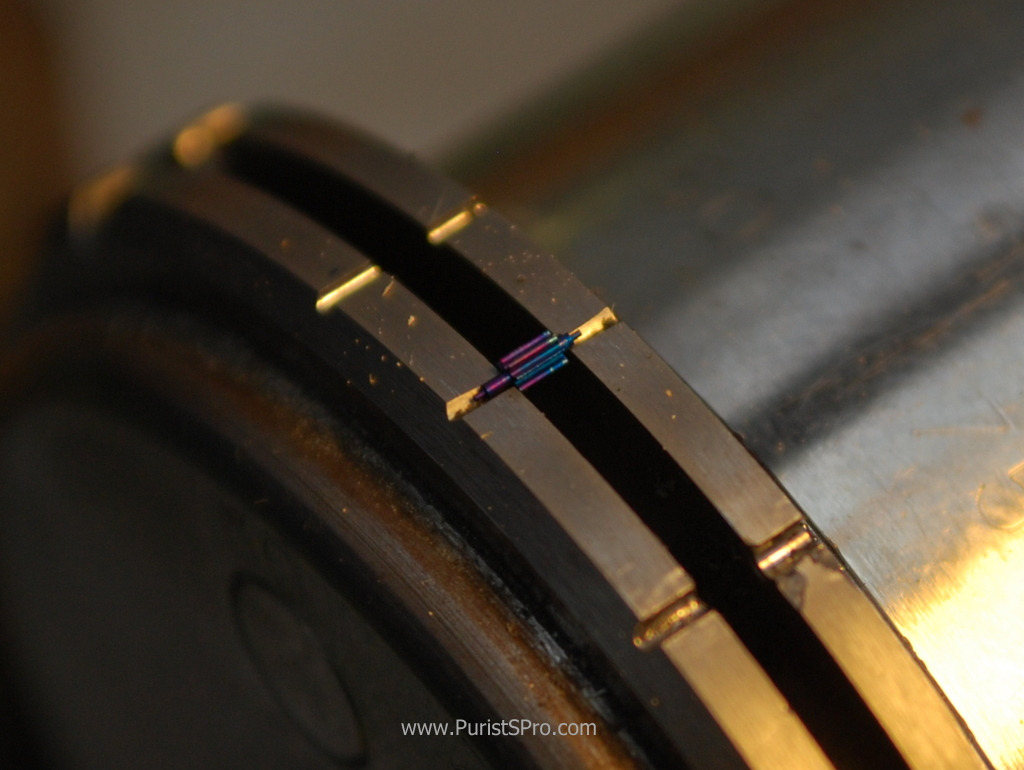
The pinion is held between two disks with V-notches in their rims. Around the rim the notches have different depths. When setting up the machine for a particular pinion the watchmaker chooses the notch depth so that the pinion sits flat. If the axles on the two ends are not the same diameter, as is often the case, notches of different depths will be chosen.

The pinion is ready for polishing.
Slowly turning by hand lets the teeth of the pinion form the edge of the wooden disk to the right curvature.

A little polish on the rim of the disk.

This wedge in a slot diagonally across the disk pushes the edge to be discontinuous. This little trick causes the pinion to turn by one tooth for each turn of the polishing disk.

Once set up the polishing goes pretty quickly. We don't want to polish too much so the tooth form is not changed.


After polishing the teeth.

The axles of the pinion are polished on the lathe with a little polishing compound on a stick of wood (tooth pick).
Now it is time to burnish the surface of the pivots, the portion of the axles that are in contact with the jewels, to the right diameter. This is done on Jacot tool. First the pinion is put into a “fish” to be able to hold and turn it in the Jacot tool.

The Jacot tool with its arc which is used to turn the work piece back and forth.

The pivot to burnished is seen here on the right side on its support.

While the piece is turned with the arc a lightly oiled burnisher brings the pivot to its final dimension.


Checking the pivot for its size in a pivot gauge. At this point we do not use a micrometer to measure the diameter as the pressure from the two jaws of the micrometer could cause slight flats on the pivot which we want to avoid.

The last step in making our pinion is to round the edge of the pivot with a burnisher.
Here we see the finished pinion stuck on a piece of Rodico so it doesn't decide to get up and disappear on us.

The total time to make this pinion is about 2 hours.

Of course this pinion is only one of many in the watch and is mounted with a corresponding wheel as we see here in the assembly drawing.

I would like to thank the people at Studio 7H38 for taking the time so show me this work in their shop and explaining all the steps.

Don
This message has been edited by DonCorson on 2015-02-26 04:15:48
Workshop Report – Making a Pinion by Hand


Fantastic!!!

What a fantastic post!

Super great report!! Wonderful

Fantastic report, Don. Working on such a part is not a small affair!

Thanks for your detailed report Don!

Ahhh This brings back personal memories


Thank you, Don!

Excellent post Don

That was phenomenal

Mind boggling!
